
This article applies to RealVNC Connect through version 8.

Ubuntu is one of the most popular Linux distributions, making it a reliable choice for remote access with RealVNC Connect. Unlike traditional virtual network computing (VNC) servers and setups, RealVNC Connect provides a simpler, cloud-connected way to securely and easily access your Ubuntu desktop remotely, even if you’re new to remote access.
As the number of remote workers continues to rise, an Ubuntu VNC server can help you unlock the benefits of remote server access, particularly through proper security configuration .
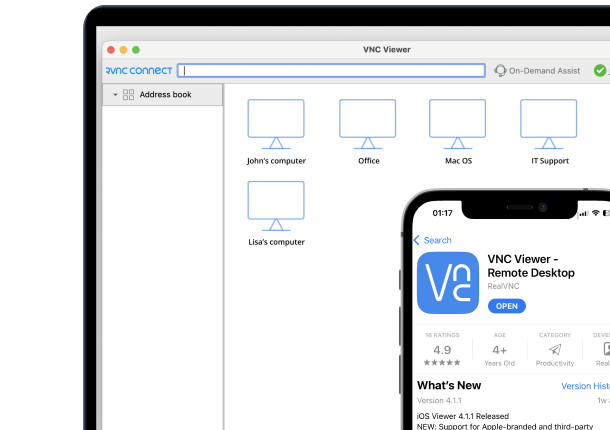
Ubuntu is currently one of the most popular Linux distributions available, and with RealVNC Connect, you can simply and securely use any machine running the Ubuntu distribution remotely. An Ubuntu VNC server is also a great tool, especially if you’re constantly working on or supporting several devices with a VNC client installed .
Establishing remote connections is simple and secure with RealVNC Connect. Here’s a step-by-step guide to installing and configuring RealVNC Connect on your Ubuntu device, both for the device you want to control and the device you want to connect from.
Set up RealVNC Connect on the device you want to control
1. Download the RealVNC Connect setup app
Go to the downloads page and select RealVNC Connect for Linux from the list. Click the Download for Linux button and save the installer to your downloads folder.

2. Install the app
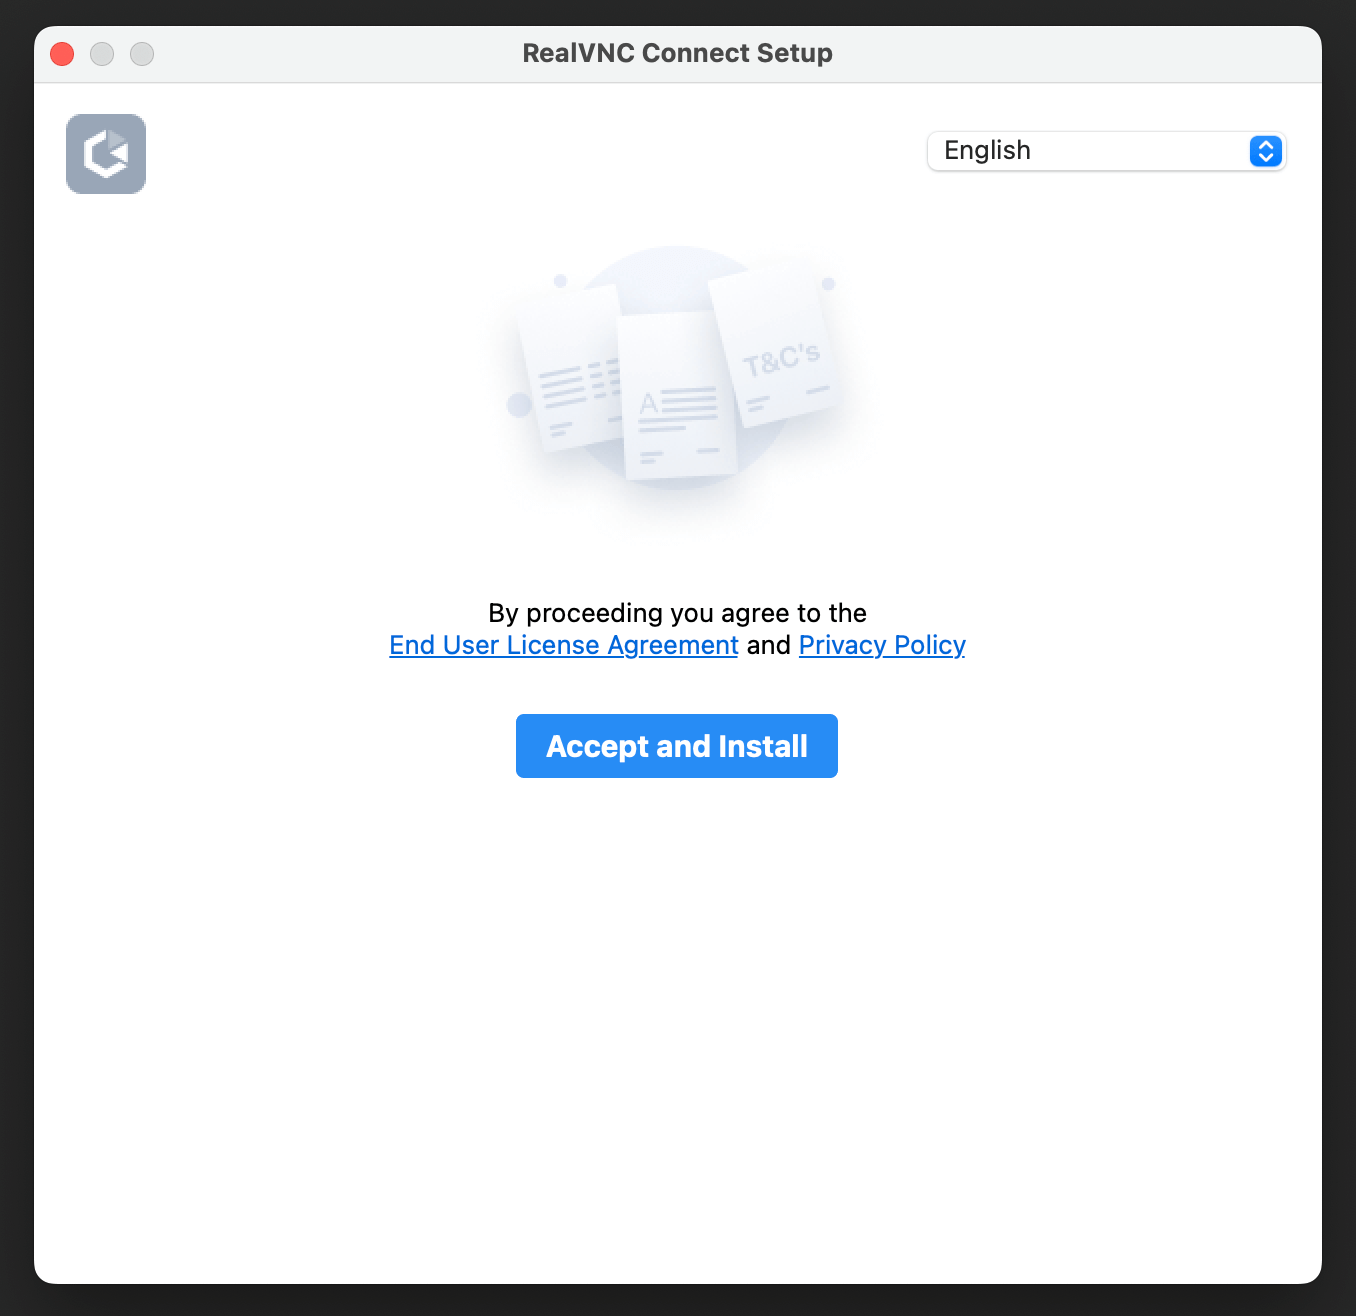
Extract the installer, then double-click the RealVNC Connect application icon to start the installation. Click the Accept and Install button and follow the prompts.
3. Choose your account option
Once the download and installation process are complete, choose one of these options:
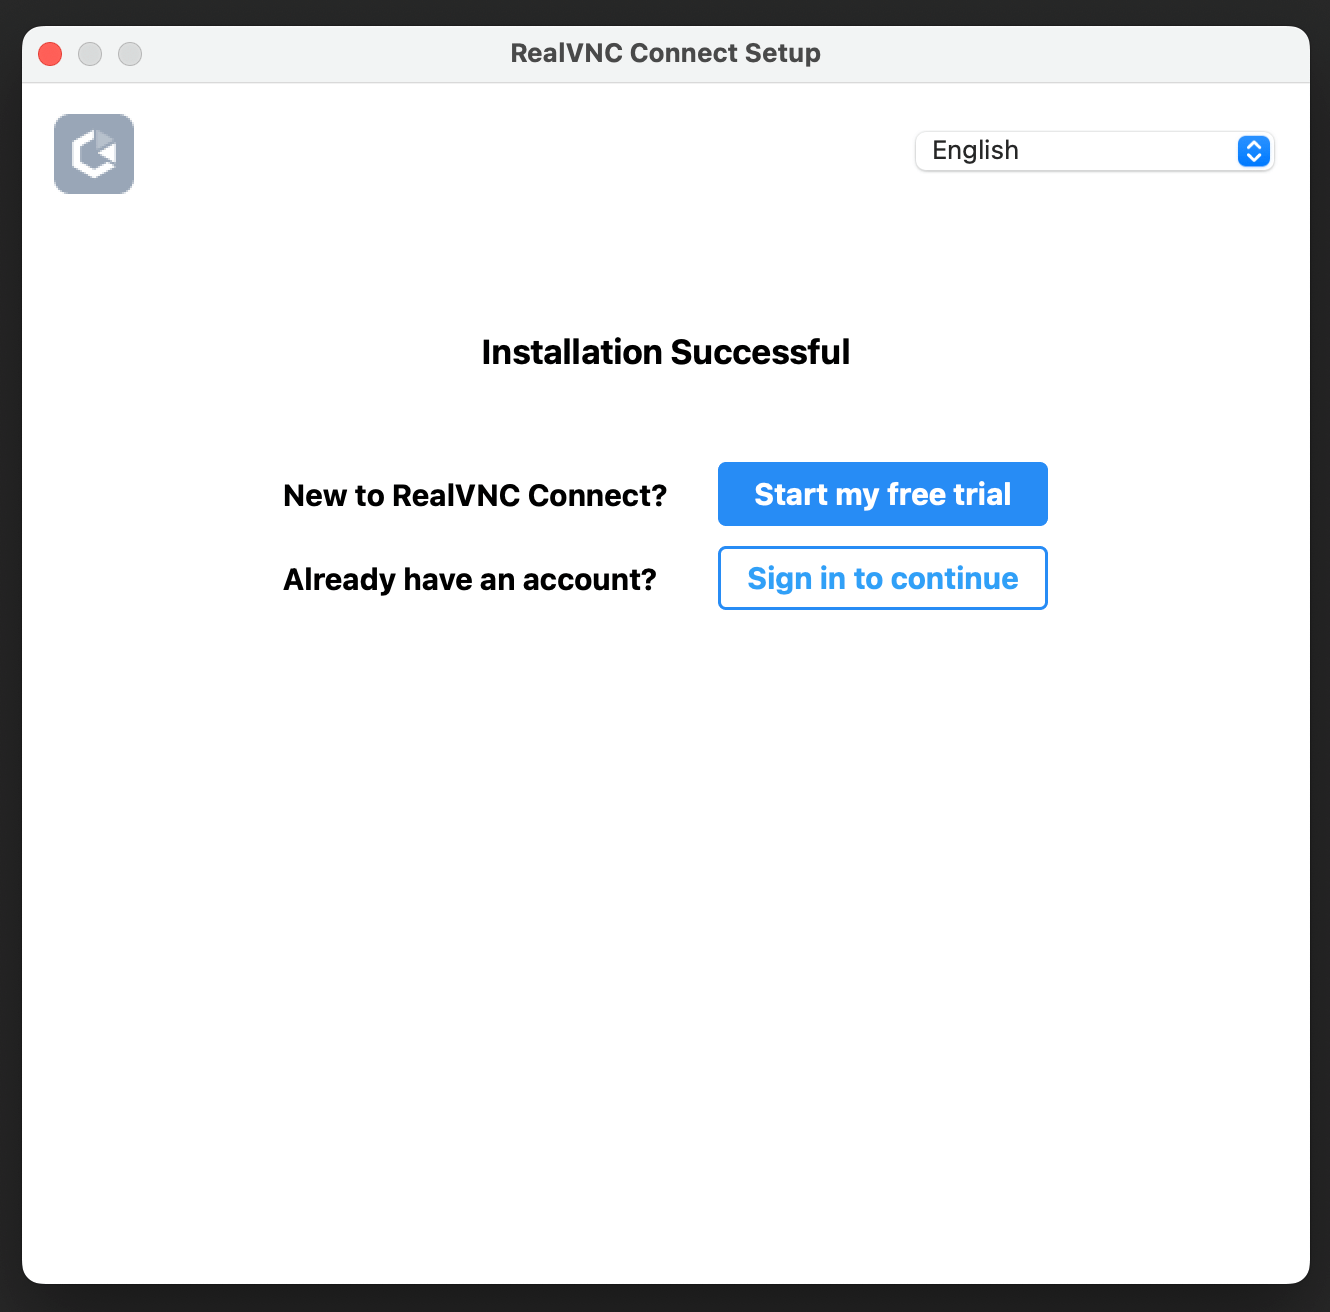
Start my free trial: If you are new to RealVNC Connect and do not already have an account or subscription, get started with a free 14-day trial.
Sign in to continue: If you are an existing RealVNC Connect user and want to set up this device with your existing account/subscription.
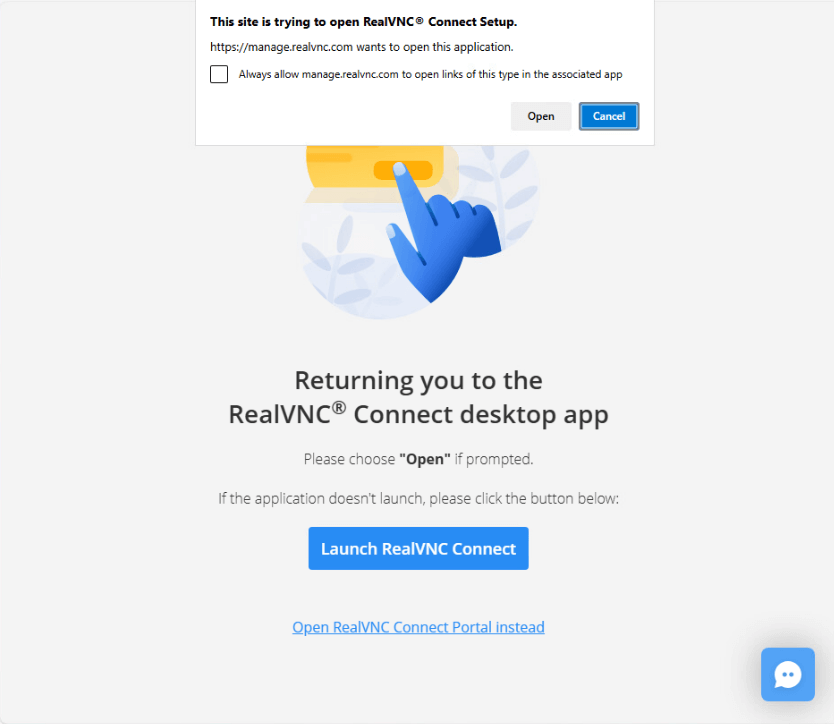
Your web browser will open automatically. Follow the on-screen prompts, then click Open to return to the RealVNC Connect Setup app.
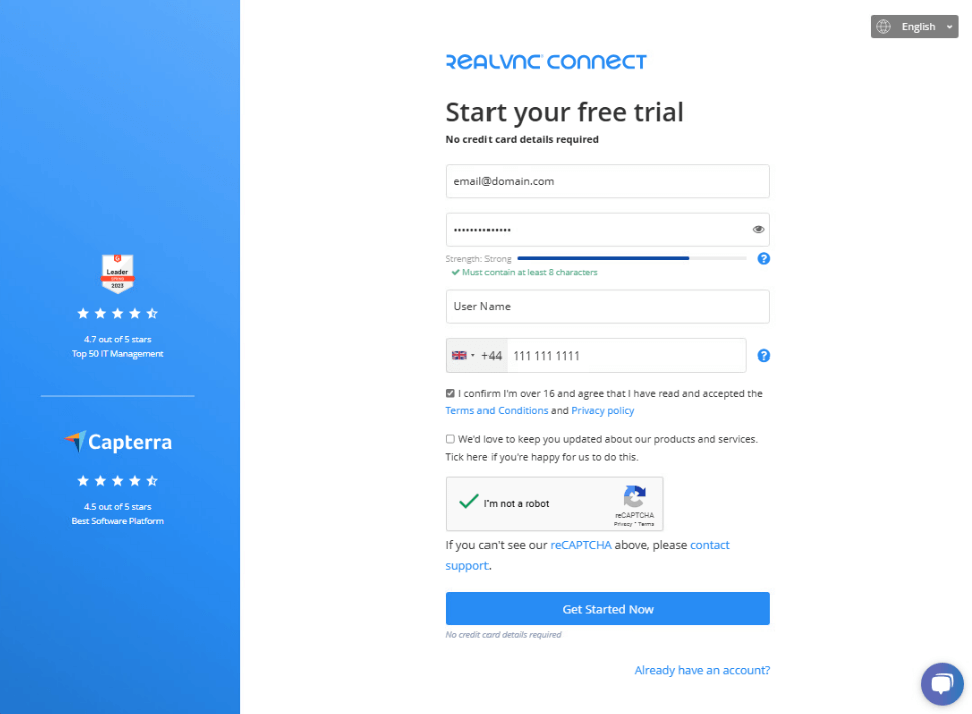
Starting a Trial
If you are signing up for a free trial, click Start my free trial.
Your web browser will open, provide the information requested and click Get Started Now.
You will be prompted to navigate back to the Setup app. Click the Open button.
In the RealVNC Connect application, choose the authentication option for your device. The options are:
VNC Device Password
Enter your own password or choose to generate a secure password. Whatever option you choose, make sure you remember or make a note of the password selected on current step – if you go further down the setup flow you will not be able to return and see it again and will need to reset it in case you lose or forget the password.UNIX password
Choose this option to authenticate to the remote computer using the username and password of an account (local or domain) of the remote computer. For more information see What username and password do I enter when I’m trying to connect to RealVNC Server?Note: If you select UNIX Password during setup, you need to ensure that the users you want to be able to connect remotely have been given permission (by default,only members of the Administrators group are able to connect). To add other users, see Managing Users and Session Permissions for RealVNC Server
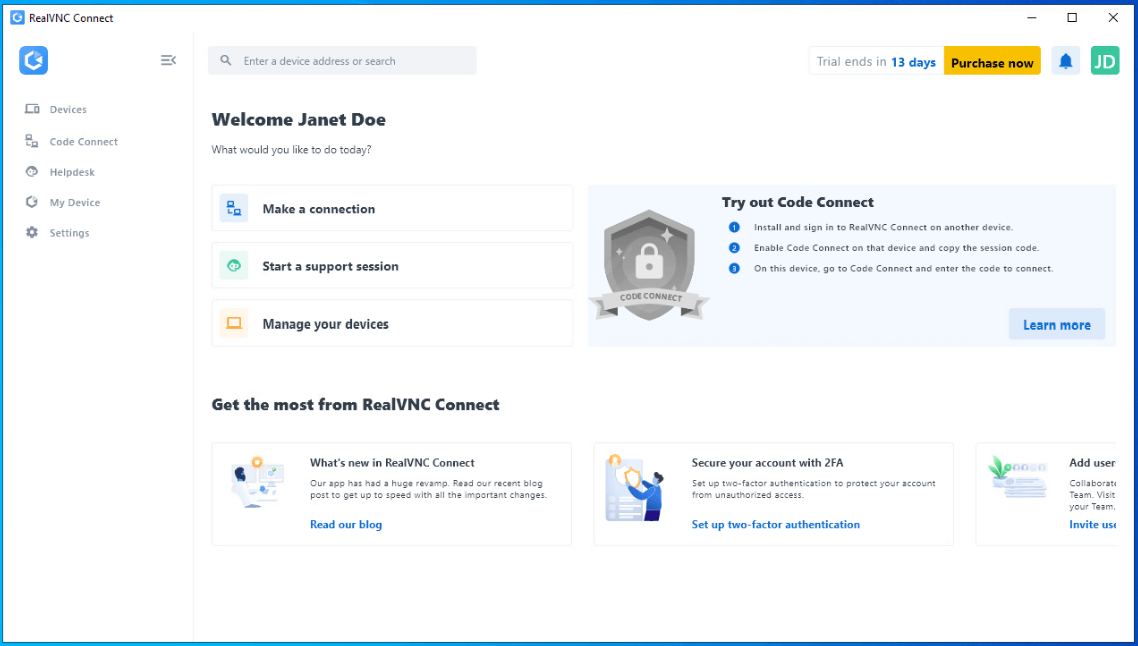
Once you have chosen how you want to authenticate, click the Launch button. When you sign in to the application for the first time the system will guide you through a tutorial flow.
Set up RealVNC Connect on the device you’re connecting from
Follow the same steps as above. You will see your remote computer(s) appear automatically in your dashboard.
Connecting to a device
To connect to a device, double click it or click Connect in the “…” menu.
If your subscription supports direct connections, enter the hostname or IP address of the device you want to connect to.
Verifying the connection identity
When a connection is started, a new window will open and present you with an Identity check screen that you can use to verify you are connecting to the correct device.
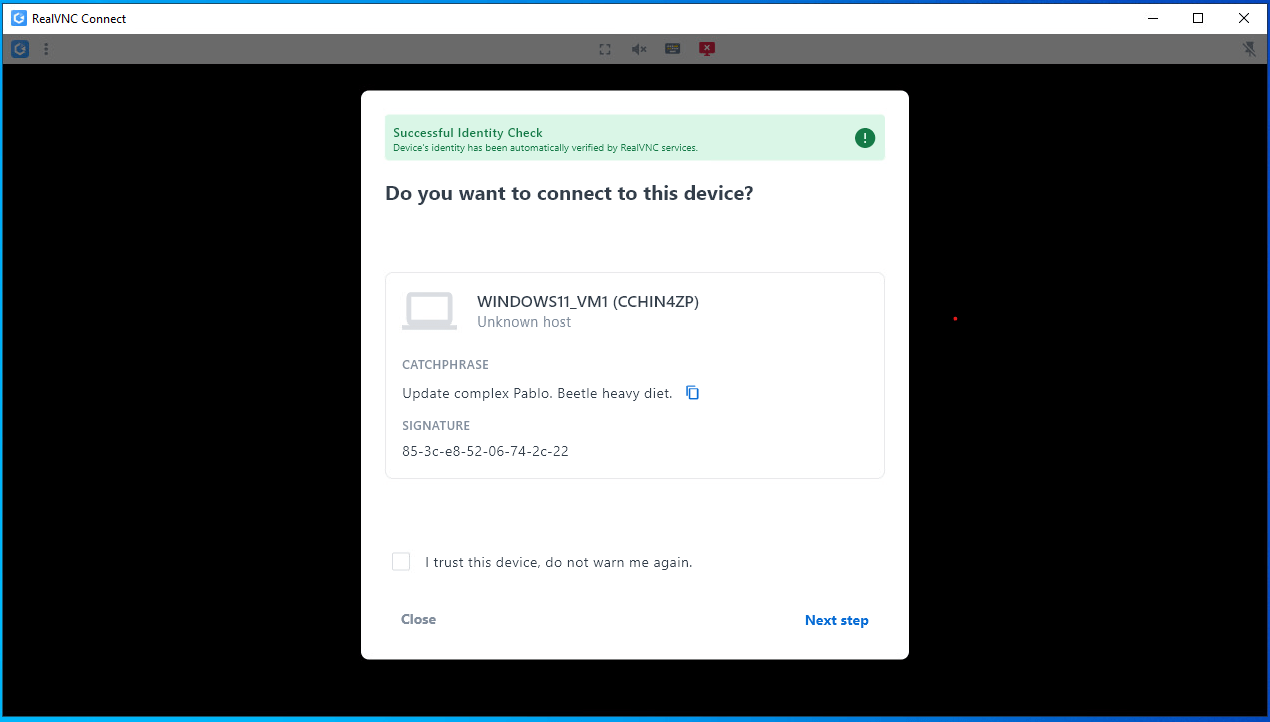
The catchphrase displayed on the Identity check screen should be the same as on the device which you are trying to connect to. Selecting the I trust this device, do not warn me again checkbox will prevent this screen showing on future connections to this device.
If the catchphrase and signature are saved and subsequently change, you will be presented with a warning. Ensure the identity of the device you are connecting to before proceeding.
For reference, the catchphrase and signature of devices can be viewed and optionally recorded by expanding the Identity check section of the My Device screen of devices you are connecting to remotely. This should be done before initiating a remote session to this device.
Click Next step to proceed.
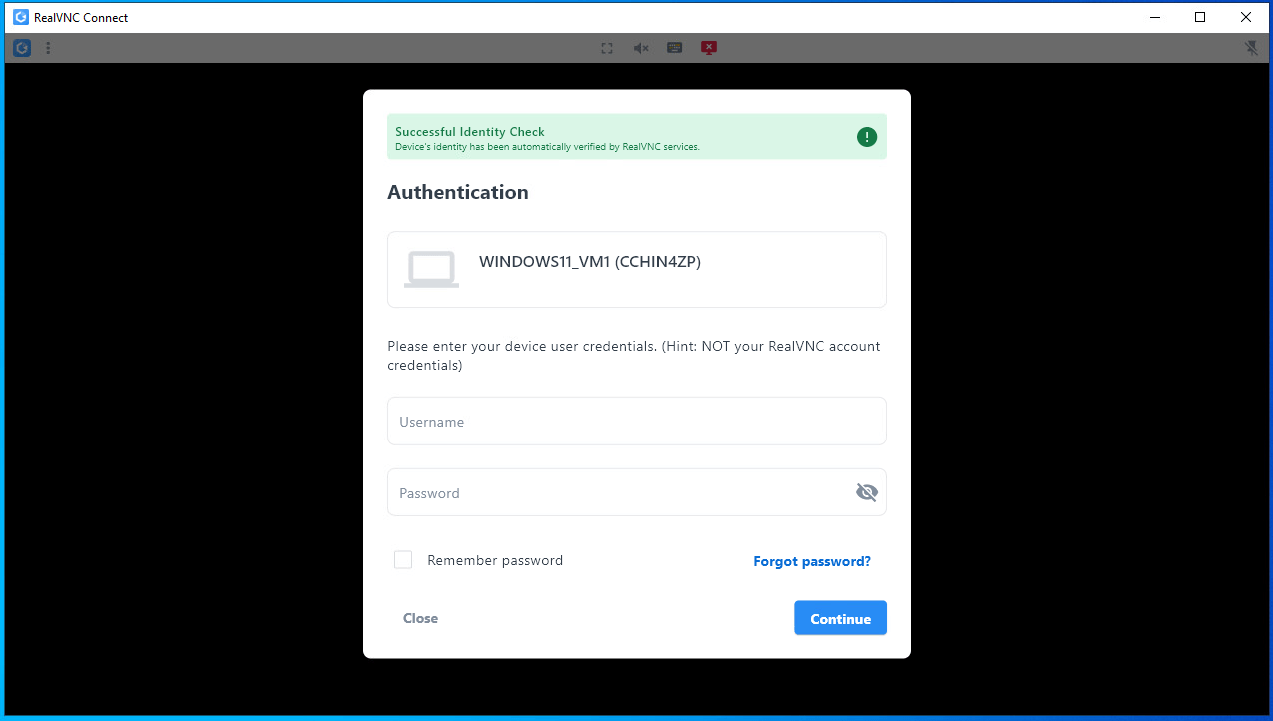
Authenticating
In the Authentication screen enter the credentials to log in to the remote device.
If you selected VNC Password when installing RealVNC Connect on the remote device, enter the password you chose in the setup process.
If you selected Windows password, enter the username and password of a valid user account that has been granted permissions to connect. Click Continue to proceed.
For overview of the session user interface and toolbar see the Connection session toolbar section of The RealVNC Connect v8 User Interface
Further information
Permissions
If you selected Unix Password during setup, you need to ensure that the users you want to connect remotely have been given permission (by default, only Administrators are able to connect).
To add other users, see Managing users and session permissions for RealVNC Server. Failure to do this may result in not being able to connect to your computer remotely.
Subscribing to RealVNC Connect
If you want to keep using RealVNC Connect after your trial expires, see How do I subscribe to RealVNC Connect?
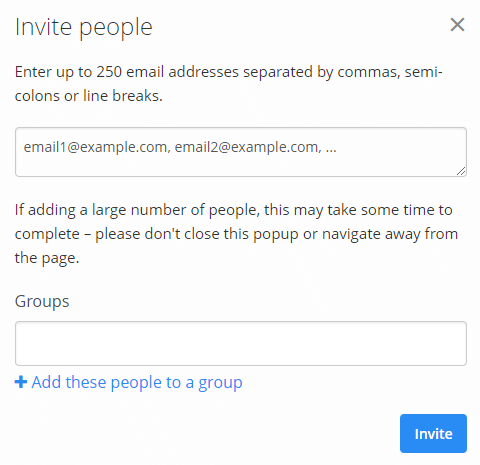
Inviting people to your team
To allow others to access your computers remotely, see How do I invite people in to my team to share remote access?
Scripting deployment and start-up
More advanced instructions for getting started with Linux can be found here: Scripting Deployment and Start-up on Linux.
Overview of common navigation options and controls
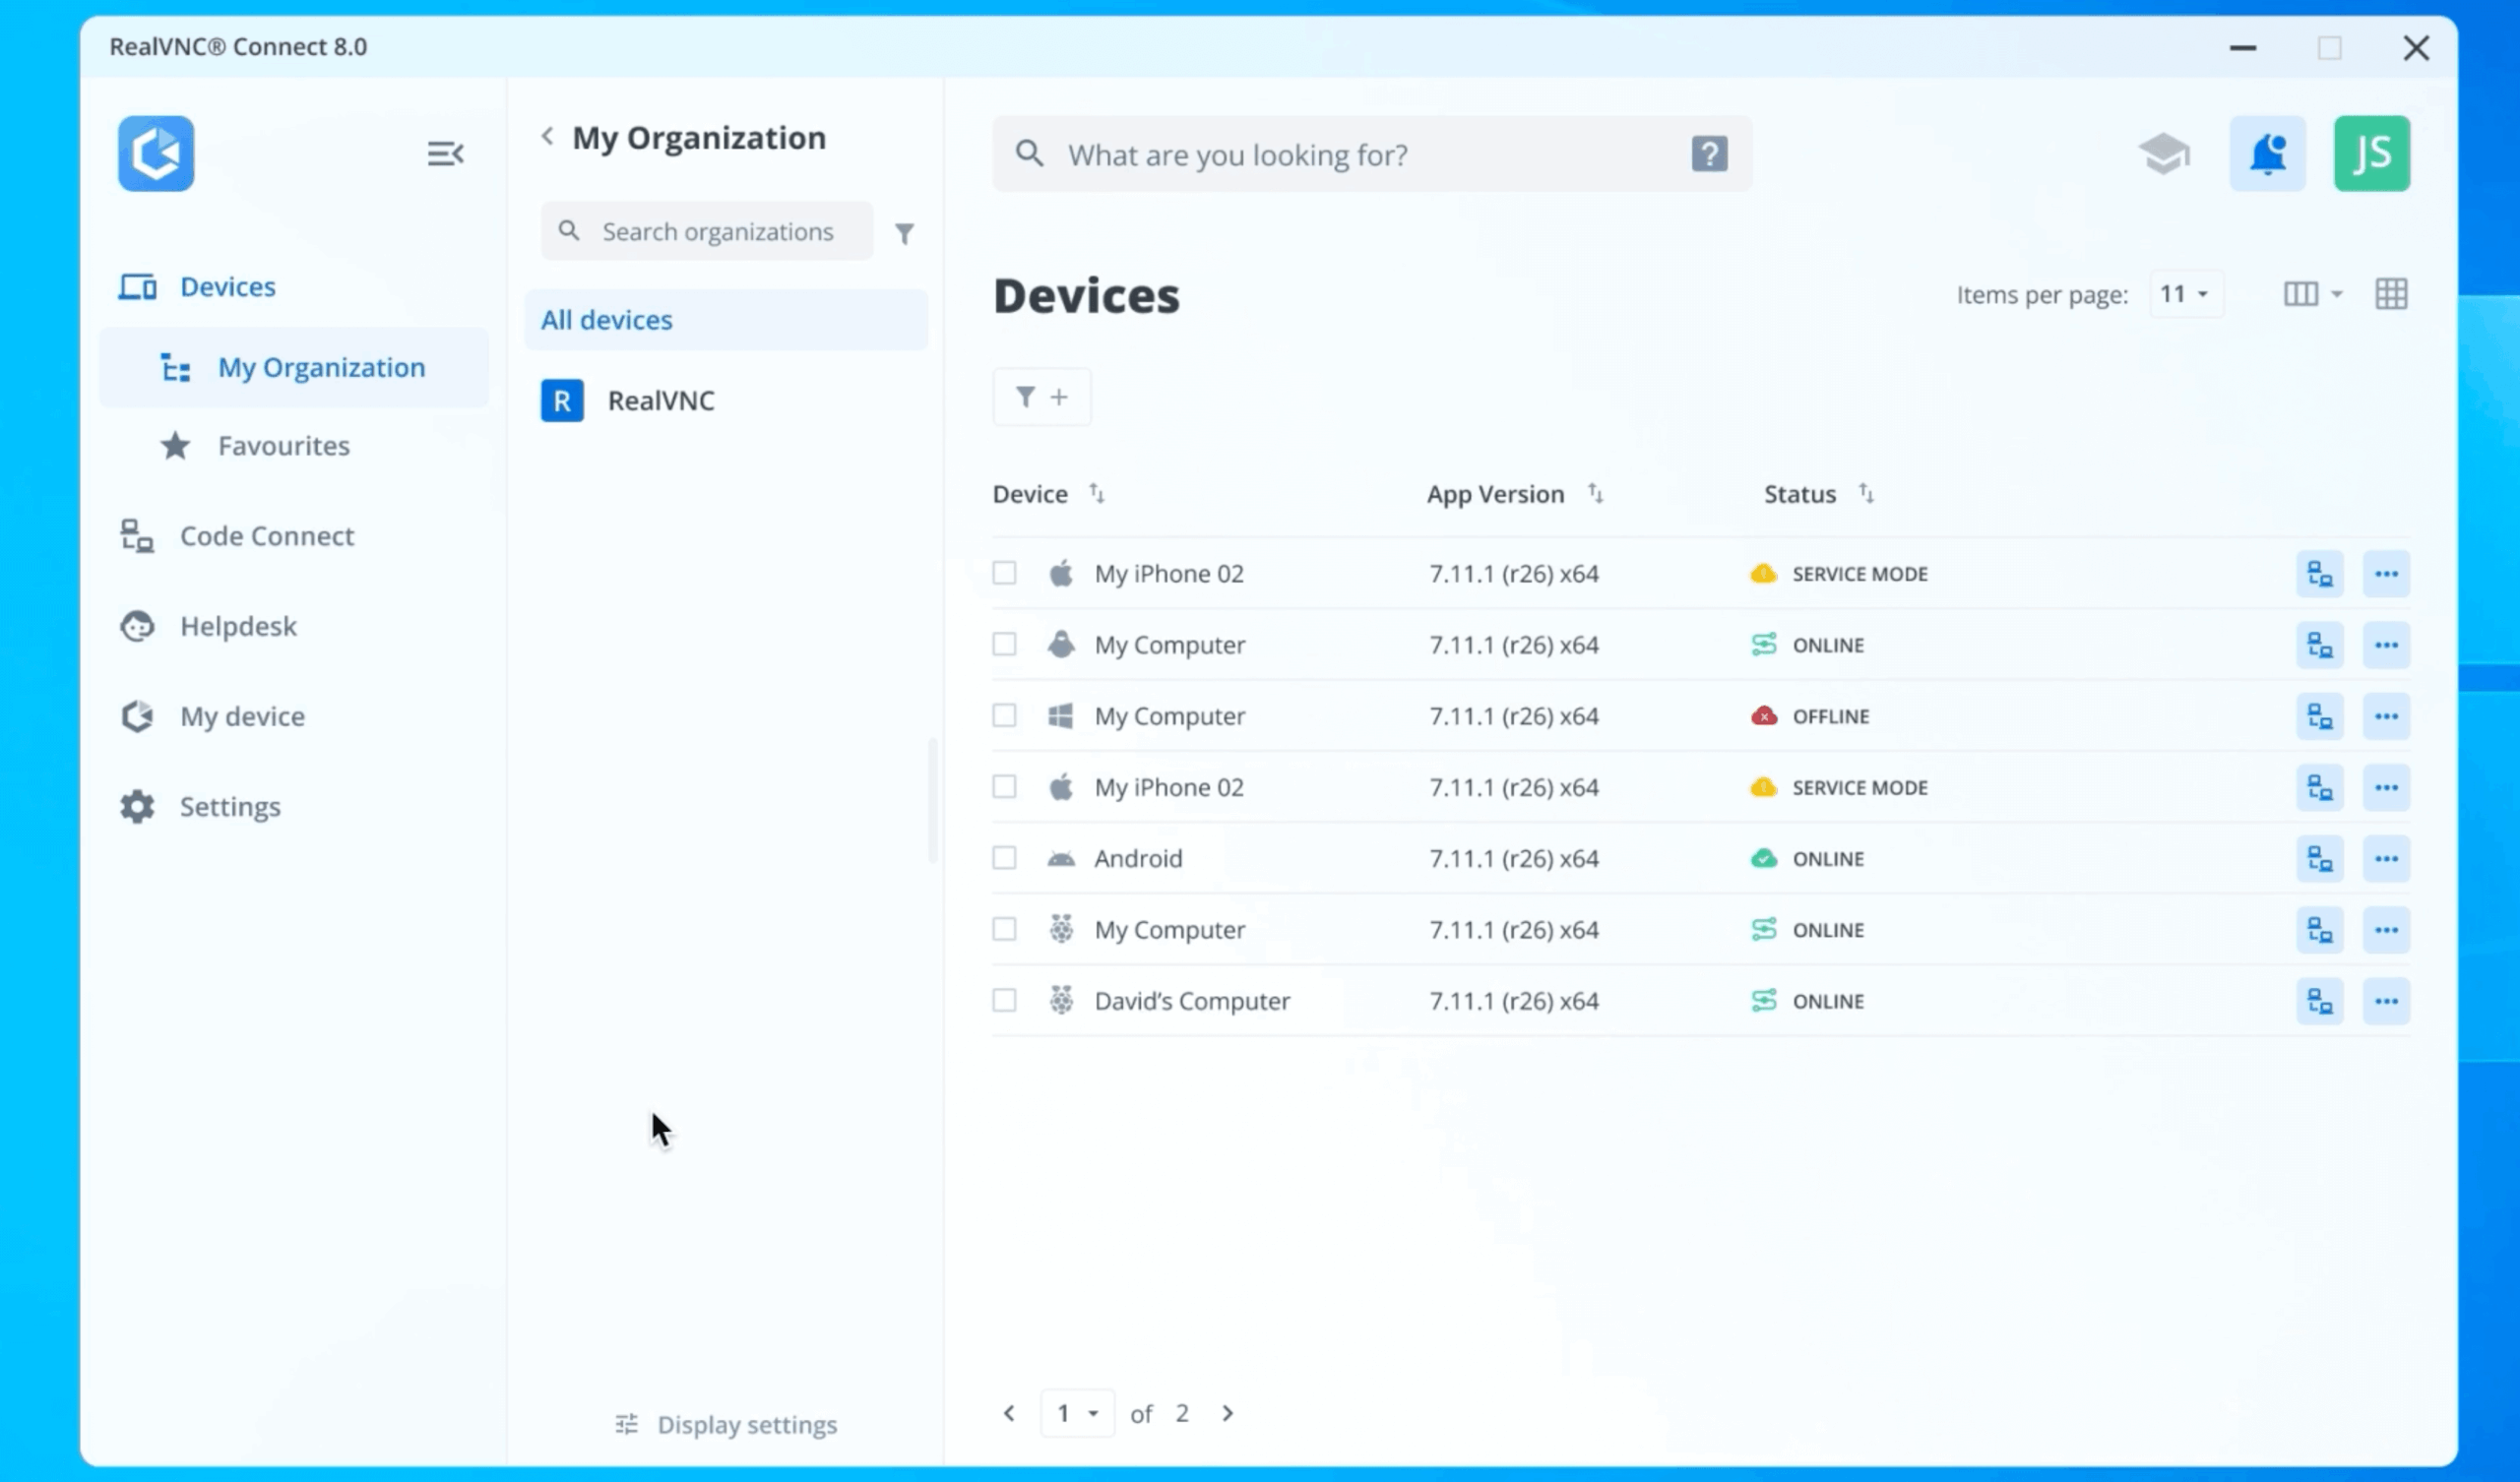
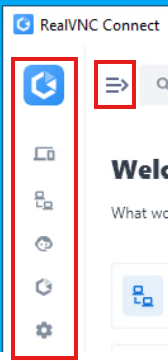
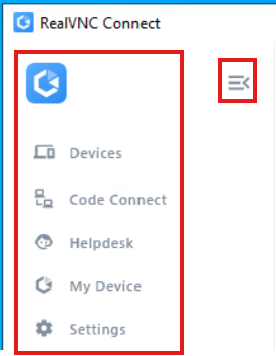
Sidebar
The Sidebar gives you access to the features of RealVNC Connect v8.
It can be collapsed or expanded for better control of the amount of the content displayed on the main screen.
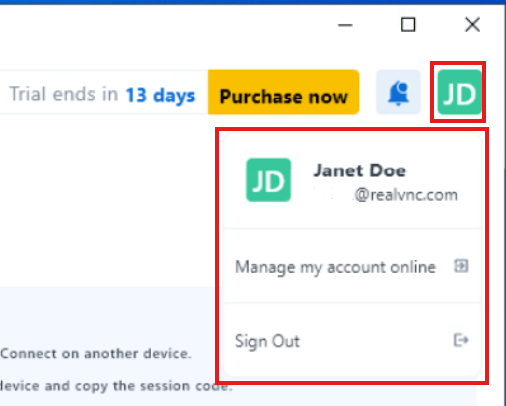
Account Settings
In Account settings you can navigate to RealVNC Portal or sign out of the RealVNC Connect application
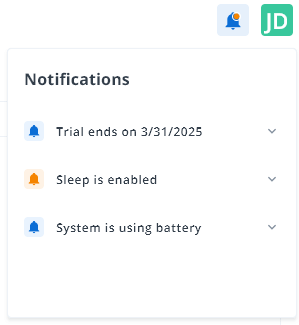
Notifications
Notifications icon displays active notifications
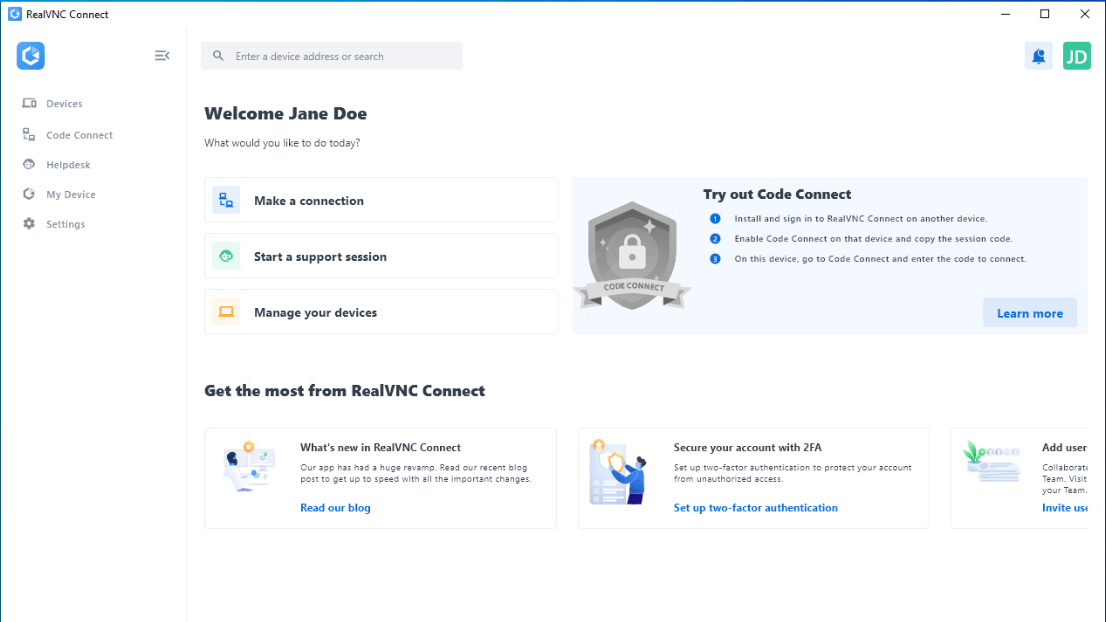
Home Page
The Home page provides insights into RealVNC Connect features, quick navigation options, and new features overview
Overview of main features
The Devices section presents the list of devices joined to your team that you can connect to.
You can switch between list and grid views, search for device or select filtering options.
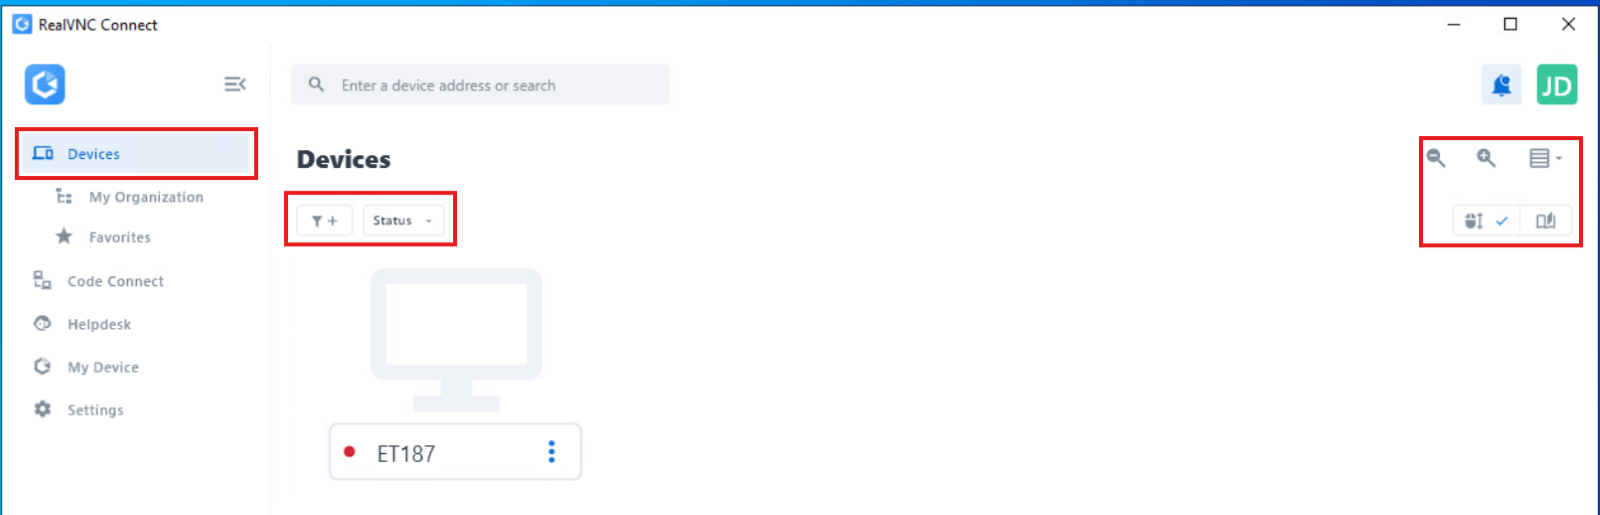
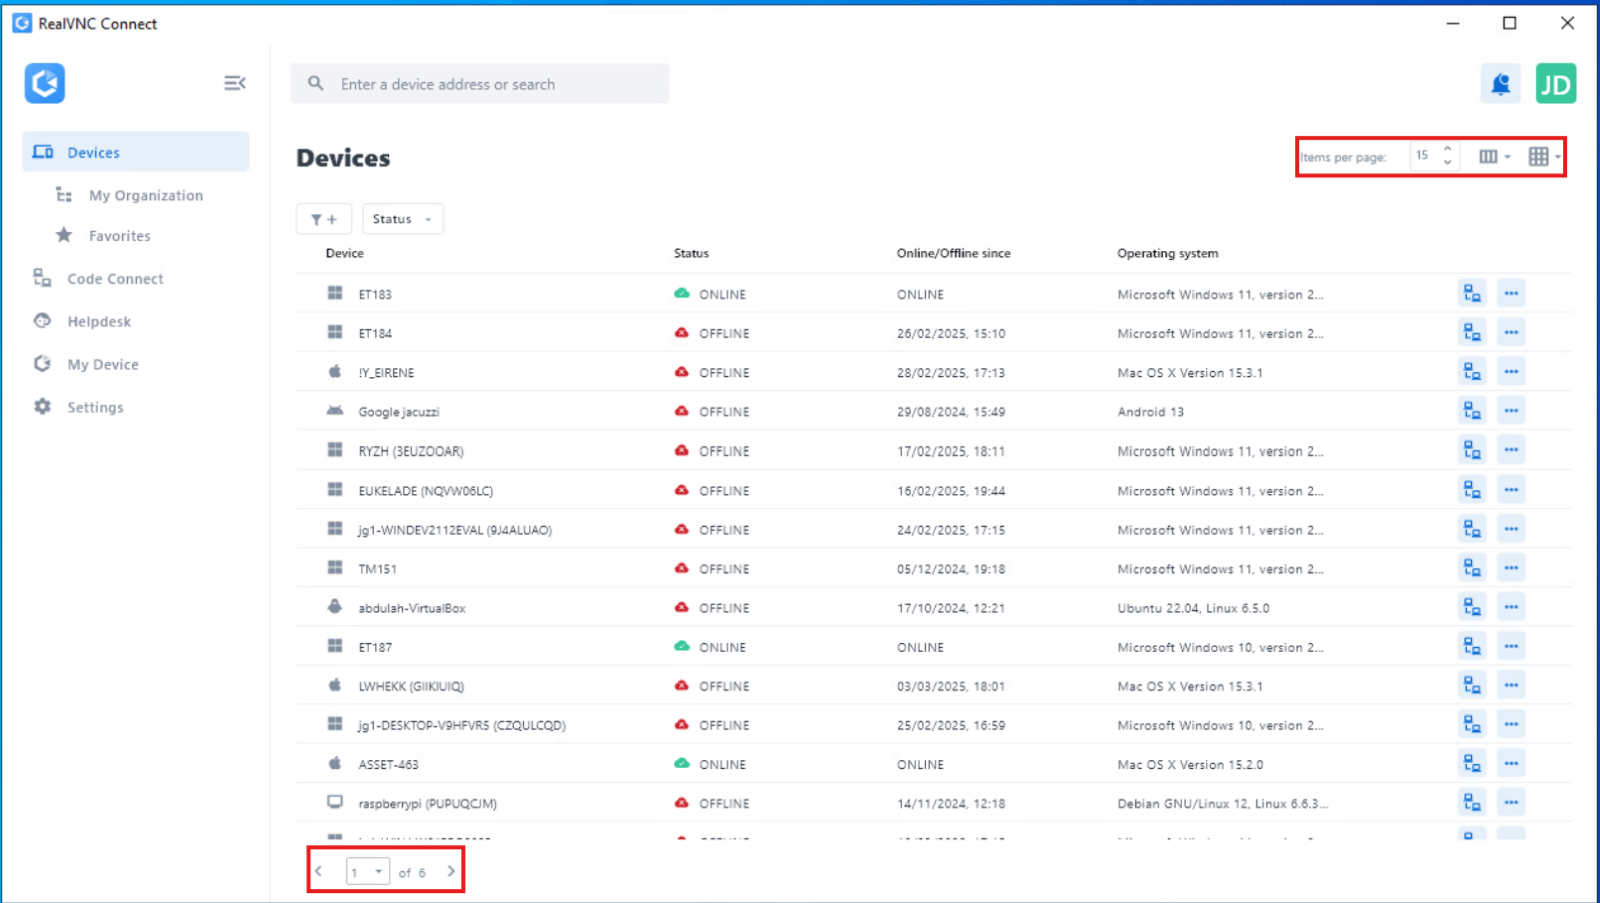
Select a remote device and initiate an outbound connection to it. See Device Access Connections in v8
Connection session toolbar
Once the connection is established you can interact with the remote device with the help of the toolbar.

The toolbar is pinned to the top of the window by default. If unpinned, the toolbar will be displayed as an icon which can be moved around the screen icon as you like. Click on the toolbar icon to access the toolbar options.
You can unpin it and move around the toolbar icon as you like.
![]()
The toolbar provides the following options to control your connection session:
Enter / exit full screen mode
Scaling options
Mute / Unmute sound from remote device
Choose monitor, only available when you connect to a device with more than 1 monitor – see Working with multiple monitors in RealVNC Connect
File transfer to exchange files between your local and remote devices, see Transferring Files Between My Device and a Remote Device in v8
Send Ctrl+Alt+Del to open a menu for accessing security options, managing unresponsive programs through Task Manager, or performing other administrative tasks on the remote device
Chat to exchange messages with user of the remote device, see Communicating Using Chat in v8
Screen recording to record a video of the connection session, see Session recording in v8
Disconnect to terminate current connection session
Reboot to reboot the remote device (connection will be automatically restored once remote device reboots)
About this session displays information on your current remote access session. You may be asked for this information if you contact RealVNC Support. Click the Save As button to save the displayed information to a text file.
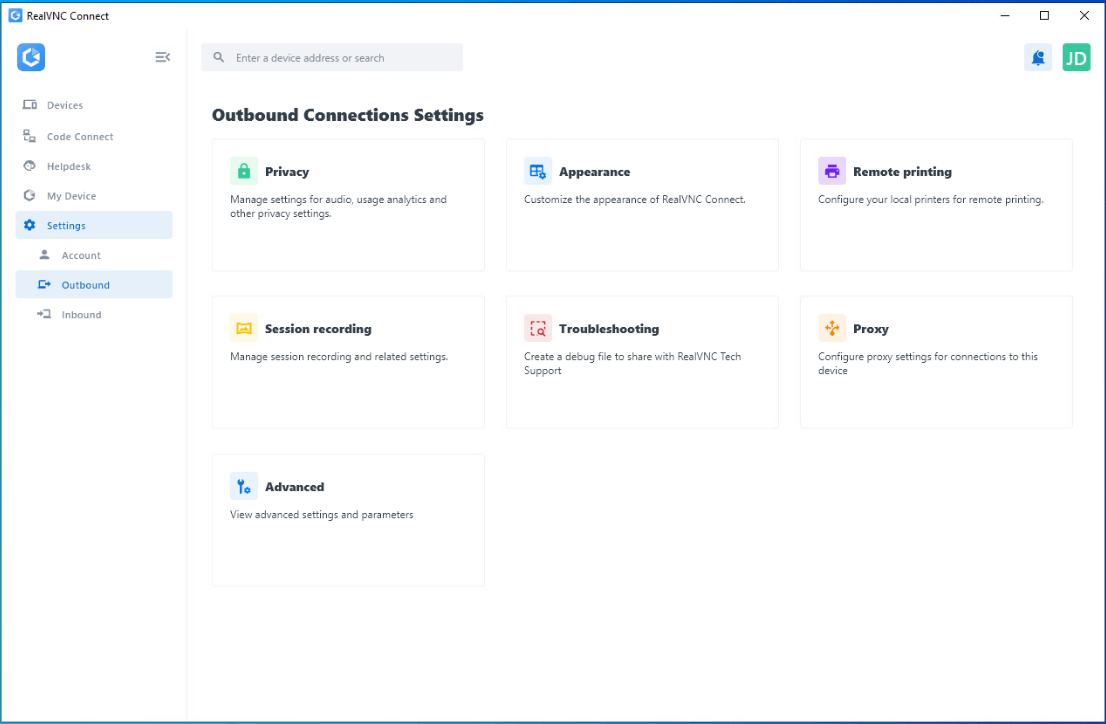
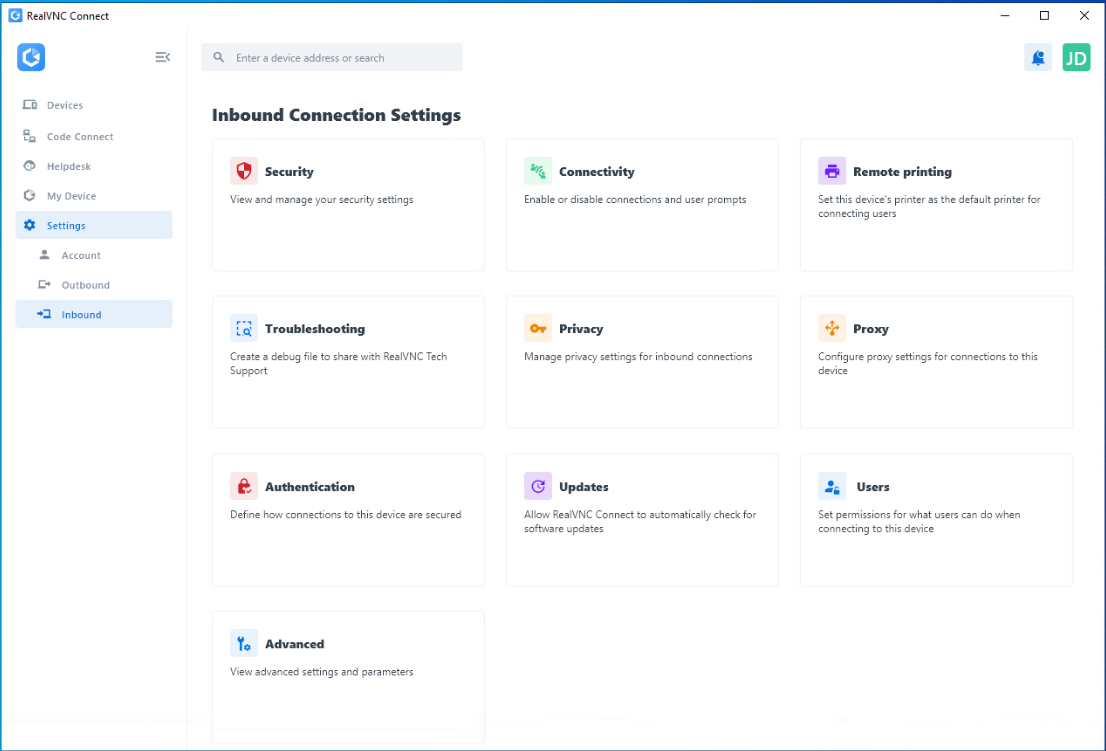
Settings menus
The Settings menus allows you to manage RealVNC outbound and inbound connectivity settings, view application information, view account settings and diagnostic information.
Outbound Connection Settings
Refer to RealVNC Viewer Parameter Reference as the parameters are similar to the RealVNC Viewer settings of previous versions.
Inbound connection settings
Refer to RealVNC Server Parameter Reference as the parameters are similar to the RealVNC Server settings of previous version
Benefits of using Ubuntu remote access
The open-source Linux distribution Ubuntu is reportedly used in the tech stacks of over 10,000 companies worldwide and by individual users. It’s no surprise that many users of this operating system would want to enjoy the benefits of remote access.
Accessibility
Ubuntu users can access their system remotely from anywhere in the world, install it, and configure it on nearly any device, as long as they have an internet connection.
This grants them the flexibility to access files, applications, and gnome desktop environments without being physically in front of their Ubuntu system. This can increase workplace productivity and employee satisfaction by giving workers more control over their schedule and workplace.
An Ubuntu secure remote desktop environment can be accessed from devices such as laptops, tablets, or smartphones. This flexibility is increased by RealVNC Connect’s cross-platform compatibility with Windows, MacOS, other Linux operating systems, and more.
Support
With Ubuntu remote access, you can share your screen or provide remote assistance to colleagues, friends, or family members.
This provides the technical support for collaboration essential in remote working environments. It also simplifies troubleshooting and allows for efficient support of individuals who may be experiencing technical issues on their Ubuntu systems.
Reduced costs
Because remote access allows technicians to diagnose and fix issues without being in the same physical space as the respective Ubuntu machine, it can reduce costs associated with hardware maintenance.
Remote access can also support managing multiple systems from one central location. As this is more efficient than maintaining individual physical machines, it’s another way that Ubuntu remote access can save you money.
Why Choose RealVNC Connect for Ubuntu remote access?
RealVNC Connect is designed to make remote access as seamless as possible, even in challenging network environments.
Here’s what sets RealVNC Connect apart for Ubuntu users:
Optimized performance: RealVNC Connect automatically adjusts for network conditions, delivering a responsive connection and high image quality, even on low-bandwidth or slower internet connections.
Tailored user permissions: Keep your data secure by setting up permission levels based on user needs. With RealVNC’s granular controls, you can ensure only the right people have access.
Easy-to-administer access: Streamline remote device management with policy templates and remote distribution, which saves significant time for IT administrators.
Productivity tools: RealVNC Connect offers two-way file transfer, remote printing, and in-session chat, helping you work effectively from anywhere.
Backward compatibility: RealVNC Connect supports older versions of Ubuntu and other distributions, maximizing flexibility and extending the lifespan of your devices.
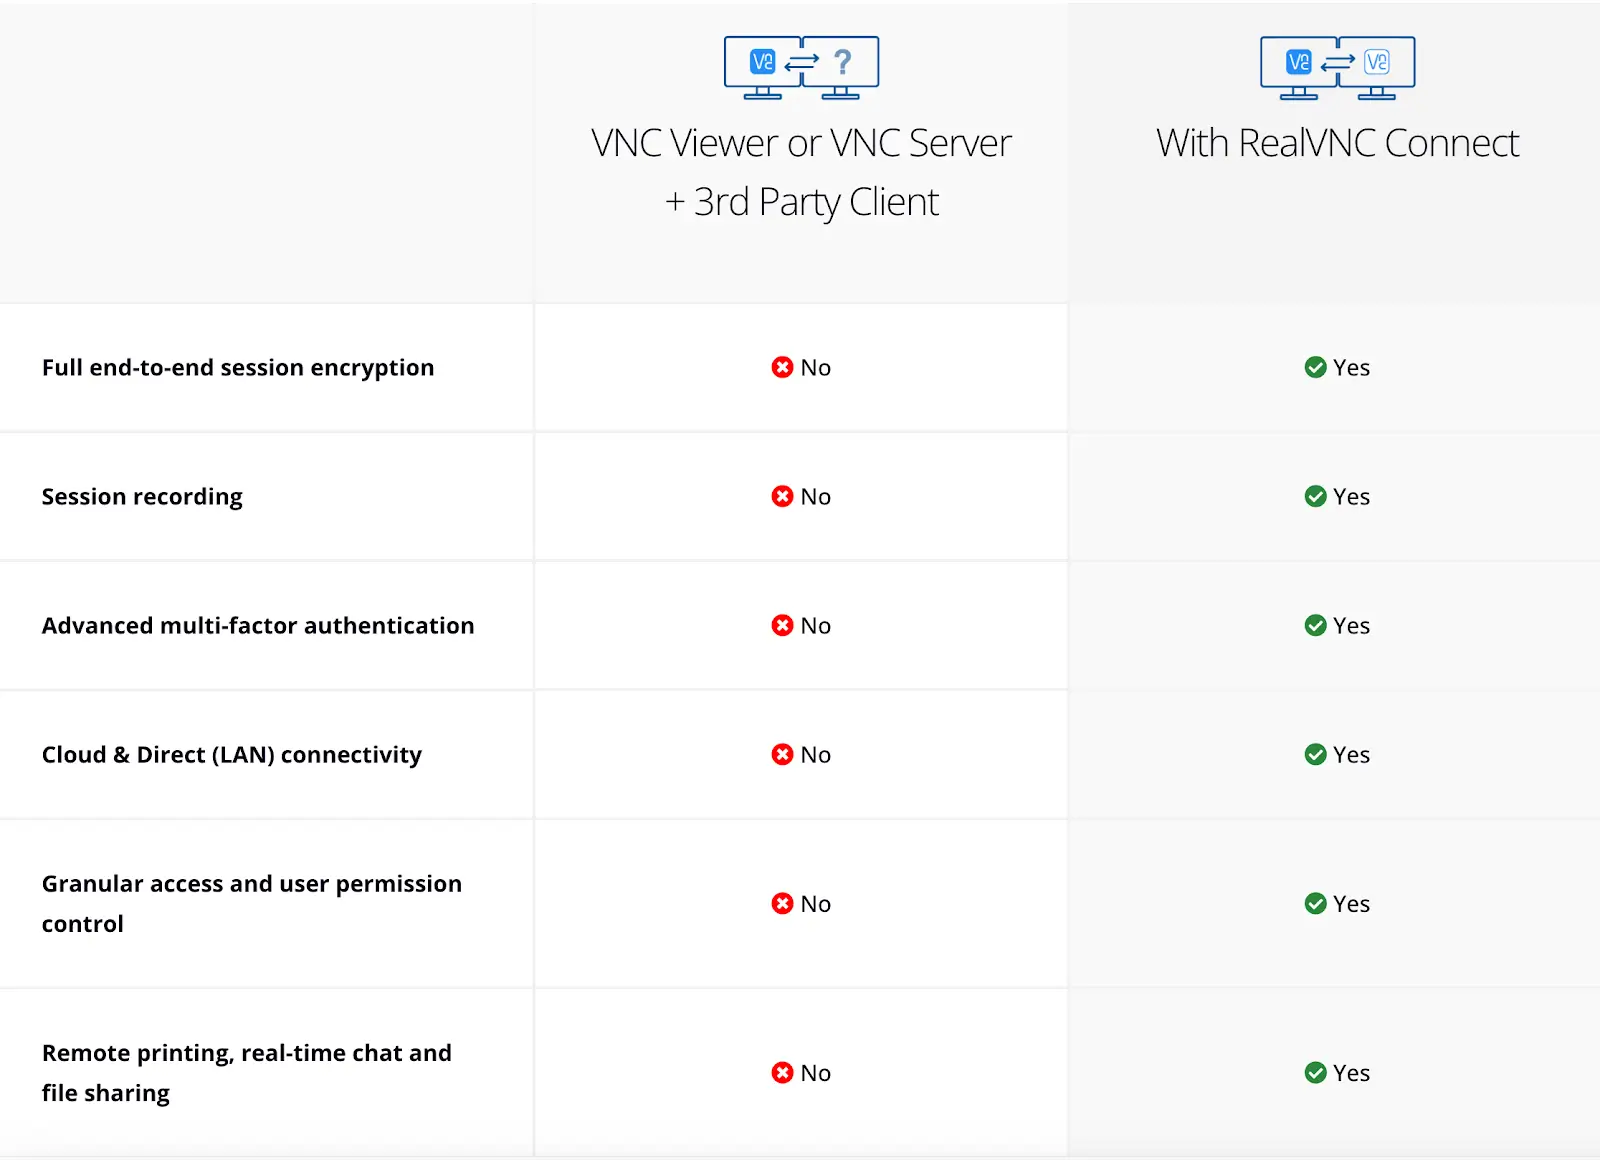
Encryption capabilities: RealVNC Connect ensures robust security through its industry-standard AES-256 encryption, providing end-to-end protection for every remote VNC session.
Secure cloud brokering: Unlike traditional VNC setups, RealVNC Connect is designed to work in a hostile environment. Our cloud brokering service is fully end-to-end encrypted without SSH tunneling, so your data is secure even when your technicians are accessing remote machines.
Supported operating systems: RealVNC Connect supports cross-platform compatibility, making it a versatile choice for various devices and operating systems, including:
Windows
MacOS
Linux (including Ubuntu and other distributions)
iOS
Android
With RealVNC Connect, you can feel like you’re right in front of your remote device thanks to its user-friendly and efficient design. Try it with our free 14-day trial and experience productivity-enhancing remote access on Ubuntu.
Take control of your Ubuntu machine today
Setting up a VNC server on Ubuntu using RealVNC Connect is a game-changer for anyone looking to remotely access their Linux machine.
Whether you’re managing an Ubuntu server’s loopback interface, providing technical support, or simply needing to access files and applications from a different location, RealVNC Connect offers a secure, user-friendly solution that simplifies the process.
By following this guide, you’ve learned how to install and configure RealVNC Connect, install a VNC server instance, and establish a secure connection using different tools.
With RealVNC Connect’s optimized performance, robust security features (like the VNC password protection), and cross-platform compatibility, you can seamlessly control your Ubuntu devices from any local machine or mobile device.
Key benefits include:
Effortless remote desktop access to your Ubuntu machine from anywhere.
Easy management of multiple VNC connections from a central location.
Optimized performance for low-bandwidth networks.
Productivity tools like file transfer, remote printing, and in-session chat.
RealVNC Connect stands out by offering superior performance even on low-bandwidth networks and providing advanced features like file transfer, remote printing, and in-session chat.
Whether you use it for personal projects or enterprise-level management, RealVNC Connect ensures a smooth, secure, and efficient remote access experience.
Ready to take full control of your Ubuntu VNC server? Start your free 14-day trial of RealVNC Connect today and experience the future of remote desktop access. Learn how to install VNC server on Ubuntu.
FAQs on using RealVNC Connect on Ubuntu
Does Ubuntu have a built-in VNC server?
Yes, Ubuntu includes a built-in VNC server known as “Desktop Sharing” or “Vino,” which allows users to enable basic remote desktop functionality. However, compared to Ubuntu’s default option, RealVNC Connect provides significant advantages, including:
Cloud connectivity: RealVNC Server uses private cloud connection brokering, enabling secure and seamless connections without the need for complex network configurations or port forwarding.
Enhanced security: RealVNC Server offers AES 256-bit encryption for all remote sessions, ensuring that data remains safe from unauthorized access. Additionally, RealVNC includes two-factor authentication (2FA), providing an extra layer of protection by requiring a secondary verification step during login.
Cross-platform compatibility: While Ubuntu’s built-in server is limited, RealVNC supports seamless connections across Windows, MacOS, Linux, iOS, Android, and Raspberry Pi devices, making it highly versatile.
Optimized performance: RealVNC dynamically adjusts for network conditions, ensuring high-quality visuals and responsiveness, even on low-bandwidth networks.
Advanced features: RealVNC Server includes productivity tools such as two-way file transfer, remote printing, and in-session chat, which are not available in Vino.
Can I connect to Ubuntu RealVNC Server from another OS?
You can easily connect to an Ubuntu VNC Server instance from another operating system using RealVNC Connect. Our VNC client software allows remote access between different operating systems and devices.
As long as you have installed RealVNC Server on the device you want to access and a RealVNC Viewer on the device you want to access it from, you can connect from different operating systems.
Make sure you have network connectivity between the client and the Ubuntu machine.
How do I secure Ubuntu RealVNC Server?
Securing your Ubuntu RealVNC Server helps protect your system and data from unauthorized access. You should always set a strong password to prevent unauthorized access to your VNC Server, and monitoring VNC access can also help alert you to unpermitted connections.
Add an extra layer of security by requiring a second form of authentication during login, the two-factor authentication (2FA).
Finally, always keep your Ubuntu server system updated. This will ensure you have the latest security patches and updates to protect you from unknown vulnerabilities.