
This article applies to RealVNC Connect through version 7.
Industry insiders expect extended sales growth for Raspberry Pi as users turn to this single-board computer for its versatility and affordability. As the tool’s applications evolve, consumers will inevitably seek assistance from manufacturers and resellers. Professionals and hobbyists are also likely to demand ways to access Pi devices remotely for collaboration and convenience.
What if you could securely manage your Raspberry Pi from anywhere worldwide? RealVNC Connect’s certified secure remote access technology can provide you, your organization, and your clientele with a seamless experience. Read on as we walk you through setting up a Raspberry Pi remote desktop using RealVNC’s powerful tools.
Prerequisites for Setting Up Raspberry Pi Remote Desktop
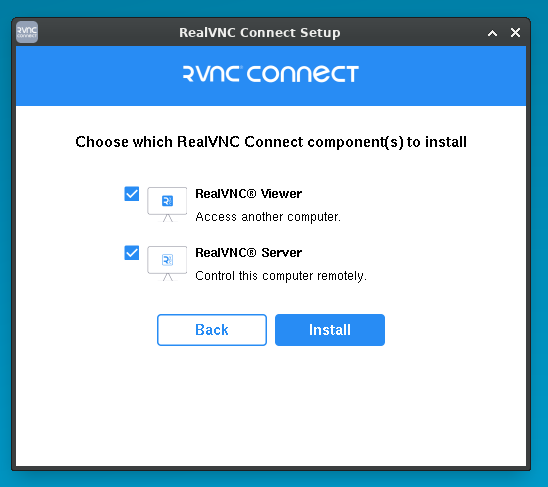
Through RealVNC Connect—composed of the RealVNC Server and RealVNC Viewer app—you can remotely view and interact with a Raspberry Pi.
RealVNC Server allows your Raspberry Pi unit to be remotely accessed on another device. Devices running on Raspberry Pi OS versions 9 to 11 have the RealVNC Server pre-built into their systems. RealVNC Connect also works with Pi OS versions 0 to 5 as long as they operate on X11 mode.
Meanwhile, the external device from which you view and control the Raspberry Pi (Mac OS, Microsoft Windows, or Linux) should carry the partner software, RealVNC Viewer.
Step 1: Prepare Your Raspberry Pi for Remote Desktop Access
Installing Raspberry Pi OS
- Prepare a microSD card on which to download Raspberry Pi Imager from https://www.raspberrypi.com/software/.

- Insert the card into a computer and head to the installation page. Scroll down to “Install Raspberry Pi OS using Raspberry Pi Imager” and choose your device (Windows, Mac OS, Ubuntu for x86).
- Once the Imager opens, choose your Raspberry device, OS (Raspberry Pi OS), and storage or installation device (SD card). Click “Next.”
- Click “Edit Settings” on the next window—”Would you like to apply OS customization settings?”—to configure your username and password, device hostname, and more. To skip OS customization, click “No.”
- Tap “Yes” on the next window, which says: “All existing data on ‘Generic MassStorageClass’ will be erased. Are you sure you want to continue?”
- Enter your password if prompted.
- Eject the SD card after the “Write Successful” window appears.
You’re now ready to boot a Raspberry Pi from the SD card.
Enabling RealVNC Server on a Raspberry Pi Device
By completing the steps below, RealVNC Server will start automatically every time you boot your Raspberry Pi:
- Activate the latest version of RealVNC Server into your Raspberry Pi units by running the commands below:
sudo apt-get update
sudo apt-get install realvnc-vnc-server
Or you can use this command if you’re already using an older version of the tool: sudo systemctl restart vncserver-x11-serviced
- Verify if RealVNC Server is enabled by selecting “Menu” and going to “Preferences” > “Raspberry Pi Configuration.” Under “Interfaces,” ensure that the VNC setting is “Enabled.”
You may also run the command sudo raspi-config. Then, go to “Interface Options” and select “VNC” before tapping “Yes” and clicking “OK.”
Step 2: Install RealVNC Connect on Your Device
Download RealVNC Viewer on all computers and devices you use to control your Raspberry Pi remotely.
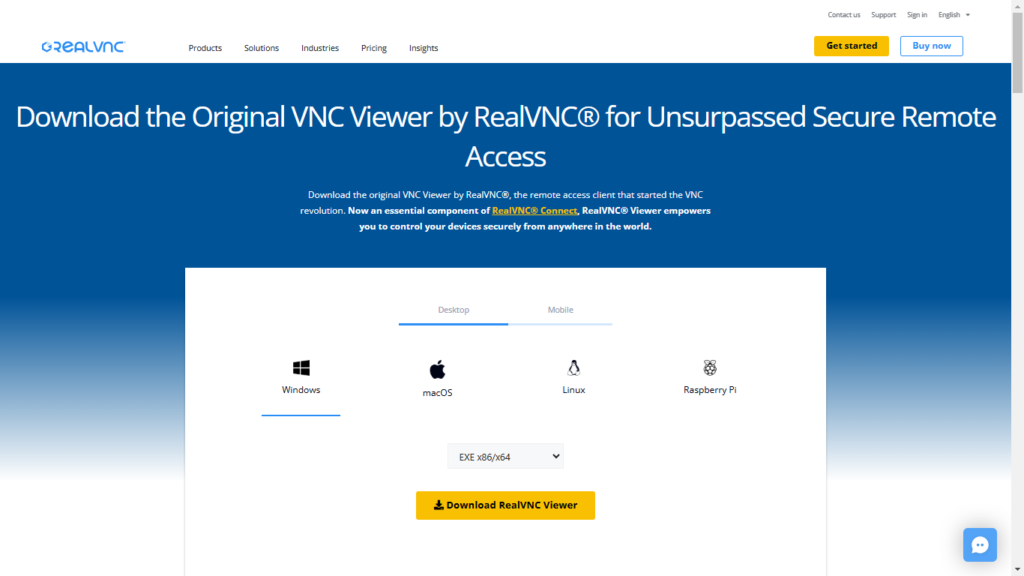
- Go to this page: https://www.realvnc.com/en/connect/download/viewer/
- Select your device from the “Desktop” (Windows computer, Mac OS, Linux) or “Mobile” (iOS or Android) tab.
- Click “Download RealVNC Viewer.”
Connecting to Your Raspberry Pi Locally
Here’s how to establish a direct connection with a Raspberry Pi device:
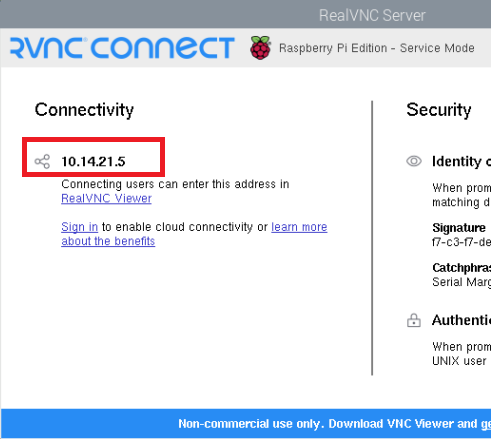
- Get the IP address by double-clicking the RealVNC Server icon on RPi’s taskbar and note the string of numbers in the status dialog under “Connectivity.”
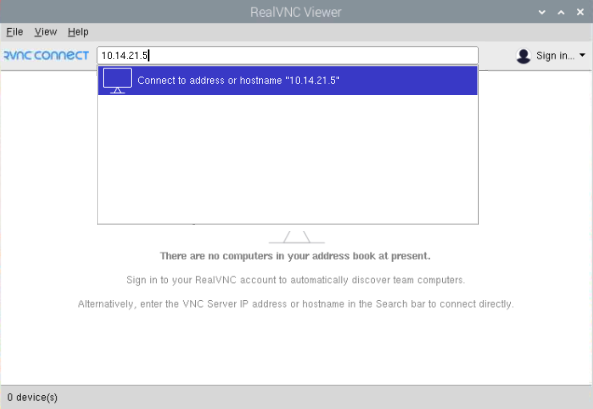
2. Run RealVNC Viewer on the remote device (from which you’ll access Raspberry Pi) and enter that unit’s IP address in the search bar.
Step 3: Access Your Raspberry Pi Remotely Using the Cloud
- Sign up for a RealVNC user account. You can:
- Sign up for an account here.
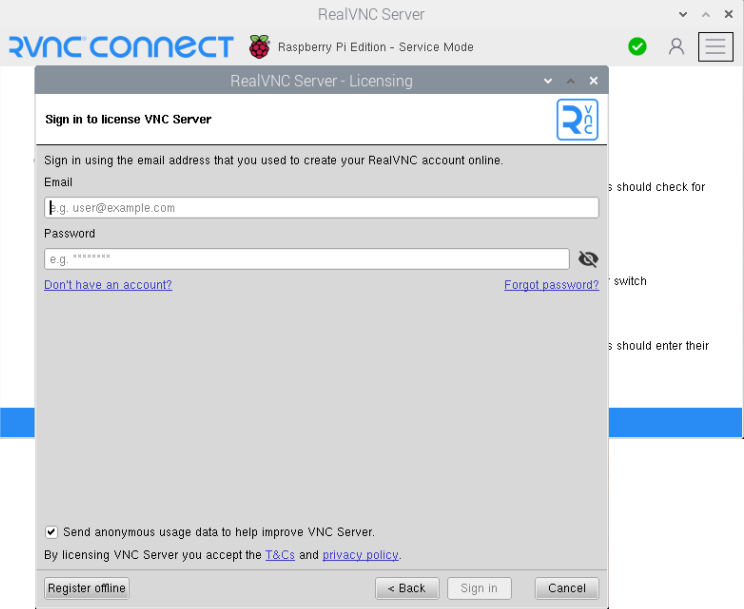
- On your Raspberry Pi device, select “Licensing” from the RealVNC Server status menu, then click “Next.” Enter your email and password, then follow the subsequent instructions.
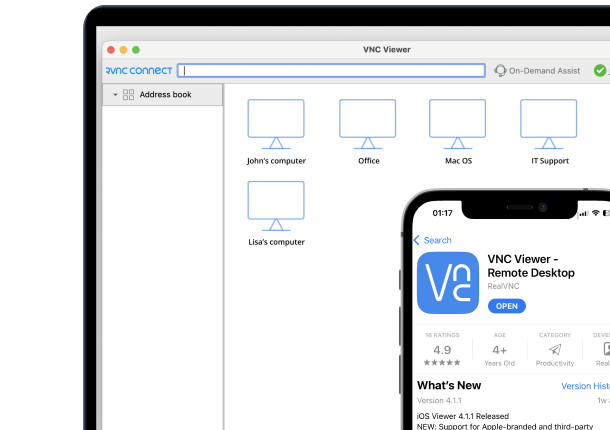
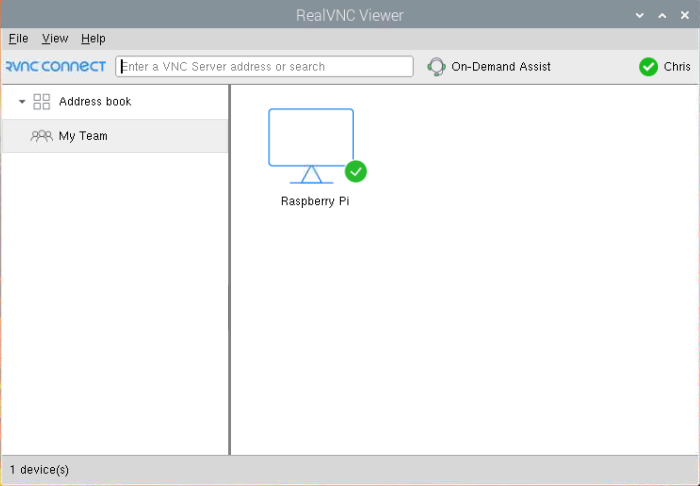
- On the remote access device, launch RealVNC Viewer and log in using the same RealVNC account credentials.
- In the RealVNC Viewer dialog box, tap the computer icon representing the Raspberry Pi.
When you get a RealVNC Server login prompt for authentication, enter the username and password you typically use to log into your Raspberry Pi. The default login credentials are “pi” for username and “raspberry” for password.
Benefits of Cloud-Based Access
Using a cloud connection to access your Raspberry Pi offers these benefits:
- Data security
- Data exchanged during remote access sessions are encrypted, preventing people from deciphering communications.
- Cloud connections with RealVNC don’t require changing your router or firewall settings.
- Convenience
- No need to look for Raspberry Pi’s IP address.
- You can access a Raspberry Pi from any device connected to the internet.
Advanced Features of RealVNC for Raspberry Pi Remote Desktop
RealVNC Connect enhances your productivity and team collaboration through these features:
1. File transfer between devices
- To send a file from your Raspberry Pi, click the File Transfer button (showing two arrows) on the toolbar at the top of the RealVNC Viewer window. When the File Transfer/Manager window pops up, select the file from the left column (under “Local”), then tap “Send.”
- When receiving a file on Raspberry Pi from a remote device, choose the file from the right column (under “Remote”), then click “Receive.”
2. Multi-monitor support and screen-sharing options
With RealVNC Viewer version 7.10.0 installed on a Windows computer, Mac OS, or Linux unit, you can remotely view other devices as long as they’re installed with RealVNC Server.
Remote desktop access to the Raspberry Pi is also possible even if it’s not plugged into a monitor when you run the command: vncserver-virtual. Meanwhile, on the device you’re using to control the RPi, enter the IP address or display number printed on the RPi’s console.
Moreover, you can install RealVNC Viewer on your Raspberry Pi to access a remote desktop computer or another Raspberry Pi by entering the following command: sudo apt-get install realvnc-vnc-viewer.
3. Customizing display settings for performance optimization
To adjust the resolution, run the command sudo raspi-config. Then go to “Display Options,” choose “VNC Resolution,” and pick an option. To specify the resolution, run the command vncserver-virtual -RandR=800×600 (example).
You may also overwrite the default settings in the /boot/config.txt file as explained here or in Raspberry Pi’s documentation.
Secure Your Remote Desktop Connection with RealVNC
To protect your user data during remote desktop sessions over your Raspberry Pi RealVNC Connect, perform these steps on your RealVNC Server:
- Set the Encryption parameter to “AlwaysMaximum.”
- Enable multi-factor authentication for RealVNC Server.
- Restrict session permissions, such as giving specific users view-only access.
Troubleshoot Common Issues with Raspberry Pi Remote Desktop
Connection Problems and Solutions
Issue: RealVNC Server is enabled, but the app doesn’t start automatically (particularly when the Raspberry Pi has no keyboard or mouse connected to it.)
Fix: It may not start due to insufficient entropy. You can run the following command to install another entropy generator: sudo apt install haveged.
Issue: You’re using RealVNC Viewer, but the Raspberry Pi you’re remotely accessing uses Wayland/WayVNC, not RealVNC Server.
Fix: Unless you’re required to use Wayland, disable or turn off this program to run RealVNC Server instead. To disable WayVNC:
- Run the command: sudo raspi-config after opening “Terminal” on Raspberry Pi or connecting to it through SSH.
- Select “Advanced Options” > “Wayland.”
- Choose “X11” and then confirm.
- Reboot Raspberry Pi when prompted.
Performance Optimization Tips
- You can reduce your Pi Zero and Pi1 CPU usage by turning off encryption when using direct connections via a private local connection (not via cloud). To do this, open the RealVNC Server dialog on your Raspberry Pi. Select “Menu” > “Options” > “Expert.” Then, change the Encryption parameter to “AlwaysOff.” Restart any existing connections afterward.
- If you must install XRDP (X Remote Desktop Protocol), an open-source remote desktop access tool native to Microsoft, disable it when running the RealVNC Server. Doing so will prevent potential interference because both services use the same VNC port 5900. The code to run is:
sudo systemctl stop xrdp
sudo systemctl disable xrdp
Choose RealVNC Connect for Your Raspberry Pi Remote Desktop
Why wait to unlock endless possibilities offered by the combination of your Raspberry Pi’s versatility and RealVNC’s safety record? From IoT monitoring to remote education, RealVNC can simplify your remote desktop experience. Explore all the features and tools you can enjoy by connecting your Raspberry Pi to RealVNC Connect.
Start your remote access journey today by visiting RealVNC to download the app or start your 14-day free trial.