
Introduction to Raspberry Pi Remote Access on Mac
This article applies to RealVNC Connect through version 7.
There’s nothing more frustrating than needing to access your Pi when you’re away from home. Even worse, there isn’t much selection on Mac OS if you want to use the GUI remotely for remote desktop.
Whether you’re checking in on your home automation system, managing IoT projects, or doing some remote development, being tied to your Pi’s physical location is a limiting factor.
What makes it even more frustrating is that Raspberry Pi remote access Mac apps are not easy to find. Luckily for us, RealVNC Connect, you can securely access and control your Pi from your Mac anywhere in the world while using Mac OS.
What is Remote Access?
Remote access lets you control your Raspberry Pi while still using Mac OS as if you were sitting right in front of it. Access your Pi’s desktop, run commands, manage files, fault finding – all from your Mac. You can do this from across the room or halfway around the world.
Why is remote management important for Raspberry Pi?
Remote management is crucial for Pi users working on development projects, IoT devices, or home automation systems. It means you can update code, monitor systems, and fix issues without being present. This flexibility makes your Pi projects more manageable and gives you freedom to work from anywhere.
Why RealVNC Connect is Ideal for Mac Users
RealVNC Connect stands out with integration and macOS. You get native Mac app experience, built-in security features, and cloud-based access that just works. No complex setup needed – just install, connect, and you’re ready to manage your Pi from anywhere.
Prerequisites for Mac Raspberry Pi Remote Access
Before we dive in, let’s make sure you’ve got everything you need. . Here’s your must-have checklist:
- Raspberry Pi (Pi 4 or 5 recommended for best performance)
- Mac running macOS 11 Big Sur or later
- Remote Desktop Protocol
- Stable internet connection
- Power supply for your Pi
- microSD card with Pi OS installed
For initial setup, you’ll also want:
- Keyboard and mouse (just for setup)
- HDMI display
- Network details handy
- About 30 minutes of free time
System Requirements
Your Mac needs:
- Modern macOS installation (Big Sur onwards)
- Screen Recording and Accessibility permissions
- Enough disk space for RealVNC Viewer (100MB minimum)
Your Pi needs:
- Latest Raspberry Pi OS
- RealVNC Server installed
- Working network connection (Wi-Fi or ethernet)
Network requirements:
- Local network access for initial setup
- Internet connection for remote access
- No special port forwarding needed with RealVNC Connect’s cloud features
Download the files that you need from realvnc.com – you’ll want both RealVNC Viewer for your Mac and RealVNC Server for your Pi.
Step 1: Preparing Raspberry Pi for Remote Access
Installing Raspberry Pi OS
Let’s kick things off and get your Pi ready for remote desktop fun. The goal here is to get to your Raspberry Pi’s desktop, and the easiest way on a Mac is using Raspberry Pi Imager:
- Grab Pi Imager from raspberrypi.com/software
- Pop your microSD into your Mac (you might need an adapter)
- Fire up the Imager and click ‘Choose OS’
- Pick Raspberry Pi OS
- Select your microSD card
- Hit ‘Write’ and let it do its thing
Enabling VNC on Raspberry Pi
Now let’s get VNC running on your Pi:
- Boot up and click the Raspberry menu
- Head to Preferences > Raspberry Pi Configuration
- In Interface Options, enable VNC
- Click OK and restart when prompted
For headless setup (no monitor), add these lines to /boot/config.txt:
hdmi_force_hotplug=1
hdmi_group=2
hdmi_mode=16
To check RealVNC Server:
- Open Terminal (you command line)
- Run: sudo apt-get update && sudo apt-get install realvnc-vnc-server
Step 2: Installing RealVNC Connect on Mac
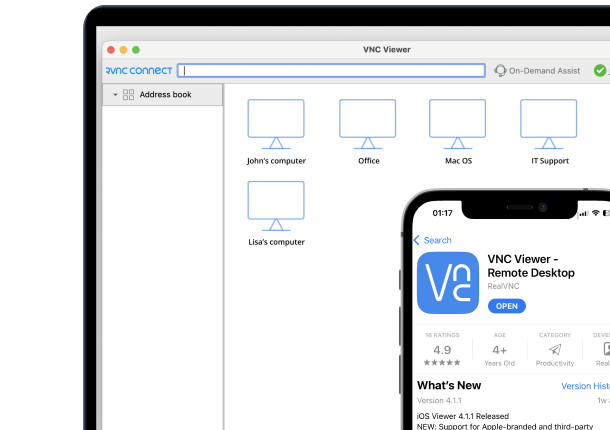
Downloading and Installing RealVNC Viewer
Getting your Mac set up for remote desktop with RealVNC is pretty straightforward:
- Head to realvnc.com/connect/download/viewer/
- Grab the Mac version (think of it as the VNC client
- Open the .dmg file
- Drag RealVNC Viewer into Applications
- Launch it from Applications
Your Mac will need a some permissions first:
- Click ‘Open’ at the security prompt
- Allow Screen Recording when asked
- Enable Accessibility access
Connecting to Raspberry Pi
Next, let’s get your Pi’s IP address:
- On your Pi, open your Raspberry Pi Terminal and type: hostname -I
- Note the first number (like 192.168.0.5)
In RealVNC Viewer:
- Hit ‘File > New connection’
- Type in your Pi’s IP
- Give it a name (like “Workshop Pi”)
- Click ‘OK’
Step 3: Secure Remote Access Techniques
Mac-Specific Security Features
Security is something to be mindful of when setting up remote desktop access. RealVNC Connect makes it easy with built-in features:
- Two-Factor Authentication:
- Log into your RealVNC account
- Enable 2FA in Security Settings
- Use your phone for verification
- Encryption and Security:
- End-to-end encryption built-in
- Session permissions you can control
- Automatic connection security
- Keychain Integration:
- Store credentials securely in macOS Keychain
- Quick access without security worries
- Password protection
Cloud-Based Access Methods
RealVNC Connect’s cloud features make remote access simple, especially from a Mac computer:
- No port forwarding needed
- Forget about static IPs
- Access from anywhere
The system works smart:
- First tries direct peer-to-peer connection
- Falls back to secure cloud relay if needed
- All happens automatically – you won’t notice
Multi-device management is a breeze:
- Control multiple Pis from one window
- Switch between devices easily
- Same secure connection everywhere
Troubleshooting Mac-Specific Issues
Common Connection Problems
Running into trouble? Check these usual suspects:
- Mac’s firewall blocking RealVNC Viewer?
- Pi powered on and connected to the network
- Right IP address
- Network connection is solid
Quick fixes:
- Open System Settings > Network
- Update your router’s firmware
- Reboot if your devices freeze
- Check your Pi isn’t overheating
Performance Optimization
If things feel slow when you are trying to remote desktop with ReaVNC:
- Lower picture quality in RealVNC Viewer
- Switch to 256 colors
- Enable “Adjust to network conditions”
- Use Ethernet connections if possible
- Disable apps that you don’t use on your Pi
- Try “Optimize for WAN” for remote work
Conclusion and Next Steps
That covers everything you need to know about setting up RealVNC Connect between your Mac computer and Raspberry Pi for a seamless remote desktop experience. Once you’ve tried managing your Pi remotely, you’ll wonder how you ever lived without it.
Head to realvnc.com/connect and grab RealVNC Connect to get started:
- Seamless cloud connectivity
- Easy file transfers
- Multi-device management
- Enhanced remote desktop security
RealVNC makes it possible to manage and control your Raspberry Pi and remotely access your systems easily.