
Introduction to Raspberry Pi Remote Access
This article applies to RealVNC Connect through version 7.
There’s nothing more frustrating than needing to desktop remotely to your Raspberry Pi when you’re away from your workbench. Whether you’re running a home automation system, managing a media server, or working on an exciting project, being tethered to your Pi’s physical location can really limit what you can accomplish. The solution is Raspberry Pi remote access Windows capabilities.
In this guide, we’re going to walk through everything you need to know about setting up a remote desktop connection to your Raspberry Pi using RealVNC Connect. Think of it as having a virtual presence right there at your Pi’s terminal, no matter where you are in the world. We’ll cover the installation process, security considerations, and some handy tips to make your remote experience as smooth as possible. By the time we’re done, you’ll be managing your Pi projects from anywhere with internet access.
What is Remote Access?
A remote desktop connection application lets you control your Raspberry Pi from another computer as if you were sitting right in front of it. This means you can access your Pi’s desktop, run commands, manage files, and even troubleshoot issues from anywhere in the world.
Why Choose RealVNC Connect for Raspberry Pi Remote Access?
RealVNC Connect stands out from the crowd by offering a complete package that’s perfect for Raspberry Pi users. The combination of RealVNC Server and RealVNC Viewer gives you seamless access that’s both secure and reliable. RealVNC Connect’s cloud features allow you to access your Pi from anywhere without dealing with complicated network setup or manual port configuration.
Prerequisites for Setting Up Raspberry Pi
Before we get into the remote desktop protocol and the setup process, let’s make sure you’ve got everything you need to get started. Having all your ducks in a row now will save you from headaches later on. Here’s your must-have checklist:
- Any Raspberry Pi model (Raspberry Pi 4 or 5 recommended for best performance)
- A modern Windows desktop
- A stable internet connection (the faster, the better)
- Power supply for your Raspberry Pi
- microSD card with Pi OS installed
What You'll Need Before You Begin
Head over to RealVNC’s website (realvnc.com) and download both RealVNC Viewer for your Windows PC and RealVNC Server for your Pi. You’ll also want to make sure you’ve got:
- A keyboard and mouse (just for the initial setup)
- An HDMI cable to connect your Pi to a display
- Your Wi-Fi credentials or an ethernet cable
- About 30 minutes of free time for setup
Remember: you won’t need the keyboard, mouse, and display after setup, they’re essential for getting everything configured properly at first.
Step 1: Setting Up Raspberry Pi for Remote Access
Installing the Raspberry Pi Operating System
Let’s kick things and get your Pi ready for action. The easiest way to get Raspberry Pi Operating System installed is using the Raspberry Pi Imager – saves a lot of time. Here’s what you need to do:
- Download Raspberry Pi Imager from raspberrypi.com/software
- Insert your microSD card into your computer
- Launch the Imager and click ‘Choose OS’
- Select Raspberry Pi OS (32-bit or 64-bit depending on your needs)
- Click ‘Choose Storage’ and select your microSD card
- Hit ‘Write’ and let the imaging run
Enabling VNC on Raspberry Pi
- Once your Pi is booted up, click the Raspberry menu and select Preferences > Raspberry Pi Configuration (Or type sudo raspi-config in the terminal if you’re comfortable with the command line)
- Navigate to Interface Options
- Look for VNC and select Enable
- Click OK and restart your Pi when prompted
- Open Terminal and type:
- Add these lines at the bottom:
- Save with Ctrl+X, then Y, then Enter
- Open Terminal
- Type: sudo apt-get update && sudo apt-get install realvnc-vnc-server
Step 2: Installing RealVNC Connect on Windows
Downloading and Installing RealVNC Viewer
Time to get your Windows desktop ready. Head over to realvnc.com/connect/download/viewer/ and download the Windows version. The installation is very straightforward:
- Double-click the downloaded installer
- Click ‘Yes’ when Windows asks for permission
- Accept the license agreement
- Choose ‘Install for all users’ (recommended)
- Click ‘Install’ and wait for it to finish
At this point you are all done with the install – RealVNC keeps things simple and user-friendly.
Setting Up RealVNC Viewer to Connect to Raspberry Pi
Before we can connect, we need to find your Pi’s IP address. Here’s the easiest way:
- On your Pi, open Terminal and type:
hostname -I
The first number you see is your Pi’s IP address. (Something like 10.0.0.3 or 192.168.0.5)
Next, in RealVNC Viewer:
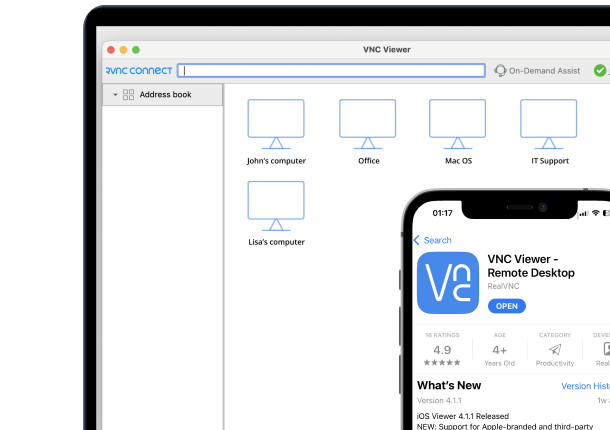
- Click ‘File > New connection’
- Enter your Pi’s IP address
- Give it a friendly name (like “My Pi”)
- Click ‘OK’
Pro tip: If you can’t find your Pi’s IP address, check your router’s connected devices list – it usually shows up as “raspberrypi” or whatever hostname you gave it.
Step 3: Connecting to Raspberry Pi from Windows with RealVNC Connect
Connecting Locally via RealVNC Connect
Let’s connect via remote desktop tool to your Pi. Now that we’ve got everything set up, connecting locally to your raspberry Pi’s desktop is pretty straightforward. Double-click your saved connection in VNC Viewer, and you’ll be prompted for credentials. Here’s what you need to know:
- Username: Your Pi’s username (default is ‘pi’)
- Password: Your Pi’s password
If you run into issues with your remote desktop access, here’s what to check:
- Make sure your Windows firewall isn’t blocking RealVNC Viewer
- Verify both devices are on the same network
- Double-check your Pi’s IP address hasn’t changed
Pro tip: If Windows Defender pops up, make sure to click ‘Allow access’ on both private and public networks – this’ll save you headaches later.
Cloud-Based Remote Access Using RealVNC Connect
RealVNC Connect’s cloud access make remote connections much more simple. Instead of messing around with port forwarding or static IPs, you can access your Pi from anywhere in the world.
To set it up:
- Create a RealVNC account at realvnc.com
- Sign in to RealVNC Server on your Pi
- Sign in to RealVNC Viewer on Windows
- That’s it! Your Pi will show up automatically in your computer list
RealVNC tries to establish a direct peer-to-peer remote desktop session first, which gives you the best performance. If that’s not possible, it’ll seamlessly switch to using their secure cloud servers as a relay.
Remember: Once you’re set up with cloud, you can forget about IP addresses completely. Just log in to RealVNC Viewer on any device, and your Pi will be right there waiting for you.
Step 4: Accessing Raspberry Pi Terminal and Desktop from Windows
Using RealVNC Connect to Access the Raspberry Pi Desktop
Once you’re connected, you’ll see your Pi’s desktop just like you were sitting in front of it. Here’s where RealVNC Connect simplifies remote connectivity:
- Use your mouse and keyboard just like normal
- Transfer files by dragging and dropping them between windows
- Access all your Pi’s applications and tools
- Adjust the display quality in RealVNC Viewer settings for better performance
Pro tip: Press F8 to bring up the RealVNC Viewer quick controls – you’ll find options for sending special key combinations and adjusting your view.
Step 5: Securing Your Raspberry Pi Remote Connection
Why Security Matters for Remotely Accessing Your Systems
Security is not something that most people find interesting, but it’s very important when you’re setting up remote desktop connection. Cyber threats are real, and the last thing you want is unauthorized access to your Pi and potentially your entire home network.
Built-in Security Features of RealVNC Connect
RealVNC Connect protects your systems from unauthorized access. It comes with impressive security features right out of the box that are configurable in the system’s remote settings:
- End-to-end encryption for all connections
- Multi-factor authentication support
- Session permissions and access controls
- Automatic connection encryption
To enable 2FA (and you really should):
- Log into your RealVNC account online
- Go to Security Settings
- Enable Two-Factor Authentication
- Follow the prompts to set up with your mobile device
Pro tip: Use a password manager to generate and store strong, unique passwords for both your Pi and RealVNC account.
Should I Use a VPN for Additional Security?
VPNs are great for many things, but you don’t need one when using RealVNC Connect for remote desktop connection. The service already provides end-to-end encryption and secure cloud access that handles all the heavy lifting for you. RealVNC’s cloud service establishes secure connections that are just as safe as using a VPN. You avoid the potential performance hit and extra complexity that comes with running a VPN connection on top of an already encrypted remote control service.
Remember: RealVNC Connect’s built-in security features are more than enough to keep your connection secure and responsive.
Step 6: Troubleshooting Common Issues with RealVNC Connect
Connection Issues
If you are running into connection problems then here are the most common issues and how to fix them:
Can't Connect at All
- Check if your Pi is powered on and connected to the network
- Verify your IP address hasn’t changed (type hostname -I on your Pi)
- Make sure Windows Firewall isn’t blocking RealVNC Viewer
- Try rebooting both your Pi and router
Connection Keeps Dropping
- Test your internet access and the connection’s speed
- Check if your router’s firmware is up to date
- Ensure your Pi isn’t overheating (type vcgencmd measure_temp to check)
Performance Optimization
If things are running a bit sluggish, try these performance adjustments:
- Tweak RealVNC Viewer settings:
- Lower the picture quality (press F8 > Options > Picture)
- Reduce color depth to 256 colors
- Enable “Adjust to network conditions” option
- On your Pi:
- Close unused applications
- Consider overclocking if you’re comfortable with it and have sufficient cooling
- Use a wired connection instead of Wi-Fi where possible
Pro tip: If you’re connecting over the internet, try RealVNC Connect’s “Optimize for WAN” setting – it makes a world of difference for remote connections.
Advanced Tips and Tricks for RealVNC Connect
Using RealVNC Connect on Multiple Devices
RealVNC Connect remote control works everywhere. Just install RealVNC Viewer on your devices and sign in with your RealVNC account. Your Pi will show up automatically on all your devices. Perfect for checking on your projects with remote desktop from your phone while you’re away from your computer or Pi.
Accessing Windows Files from Raspberry Pi
File transfers are simple with RealVNC Connect. Enable file transfer in RealVNC Viewer (press F8 > File Transfer), and you can drag and drop files between Windows and your Pi. You can also copy-paste text and files directly between systems like they share a clipboard.
Controlling Raspberry Pi from Anywhere in the World
Once you’ve set up cloud connections, you can access your Pi via remote desktop from anywhere with a internet access. No need to struggle with port forwarding or the need to remember IP addresses. Just sign in to your RealVNC account and you’re good to go.
Pro tip: RealVNC’s cloud service automatically handles the connection security and routing, so you don’t have to worry about dynamic IPs or network configurations. Plus, it’ll automatically choose the fastest connection method available – either direct peer-to-peer or through their secure cloud relay if needed.
Comparing RealVNC Connect vs. RDP for Raspberry Pi
RDP vs. VNC: Which is Better for Raspberry Pi?
Both RDP and RealVNC can get you connected to your Pi but there are differences. Here’s some comparisons about their features:
Performance:
- RDP is usually better for Windows-to-Windows connections
- RealVNC Connect has optimizations for Raspberry Pi
- RealVNC handles graphics and animations more smoothly on Pi
Compatibility:
- RDP requires additional setup and can be tricky on Raspberry Pi
- RealVNC Connect works right out of the box
- RealVNC is built into the Raspberry Pi Operating System – no extra installations needed
Security Features:
- RDP relies on basic Windows authentication
- RealVNC Connect offers enterprise-grade encryption
- Cloud connections are automatically secured without port forwarding
The Real Difference: What really sets RealVNC Connect apart is its cloud features. Remote desktop connections usually requires you to configure port forwarding and static IPs. If your internet doesn’t use static IP addresses then you will also need a dynamic DNS service to continuously update your details.
RealVNC Connect remote desktop just works. Sign in to your account, and you’re connected from anywhere in the world.
Pro tip: If you’re serious about remote Pi access, then RealVNC Connect is the easiest and most secure way to go. It’s designed specifically for remote connections, and the cloud features alone make it worth choosing over Microsoft remote desktop.
Conclusion
That covers all the basics about everything you need to know about setting up connectivity to your Raspberry Pi using RealVNC Connect. Once you’ve experienced the convenience of managing your Pi from anywhere, you’ll wonder how you ever lived without it. Being able to remotely control your system is a convenience that you wont be able to live without once you have tried it.
Head over to realvnc.com/connect to download RealVNC Connect and get started. The free version gives you plenty to work with, but if you’re serious about installing a remote desktop app, the premium features like connecting via the cloud and file transfer are worth checking out.
Remember: RealVNC Connect is more than just a remote desktop connection app. When you use it for your systems, you’re getting peace of mind knowing your connection is secure and reliable.