

Need to access your computer when you’re away from your desk? Whether you’re working remotely, supporting coworkers, or just trying to access a file from your home PC, setting up a remote desktop lets you connect to your device from anywhere.
At first, it might sound a bit technical. But once you understand the steps, it’s easier than you think.
In this guide, we’ll walk you through how to set up remote desktop access on Windows and macOS machines using built-in tools. We’ll also introduce an easier, more flexible option for users who want a secure, all-in-one solution.
By the end, you’ll know exactly how to get connected and stay productive from anywhere.
First, make sure you’re ready to connect
Before you get started with the setup, make sure a few essentials are in place:
- Stable internet connection: Remote access won’t work without it, so confirm both devices are reliably online.
- Device access: You’ll need permission (and sometimes credentials) to connect to the remote computer.
- Operating system: Make sure you’re following the right instructions for your device. Windows and macOS have different setup steps.
Once these basics are covered, you’re ready to start setting up your remote desktop.
Establishing a remote desktop connection for macOS
First, we’ll start with an Apple Remote Desktop connection. Before you begin, make sure you’re running the most recent version of macOS and that you’ve downloaded the Remote Desktop app from the App Store.

Step 1: Open System Preferences
Open System Settings, select General and then open the Sharing menu.
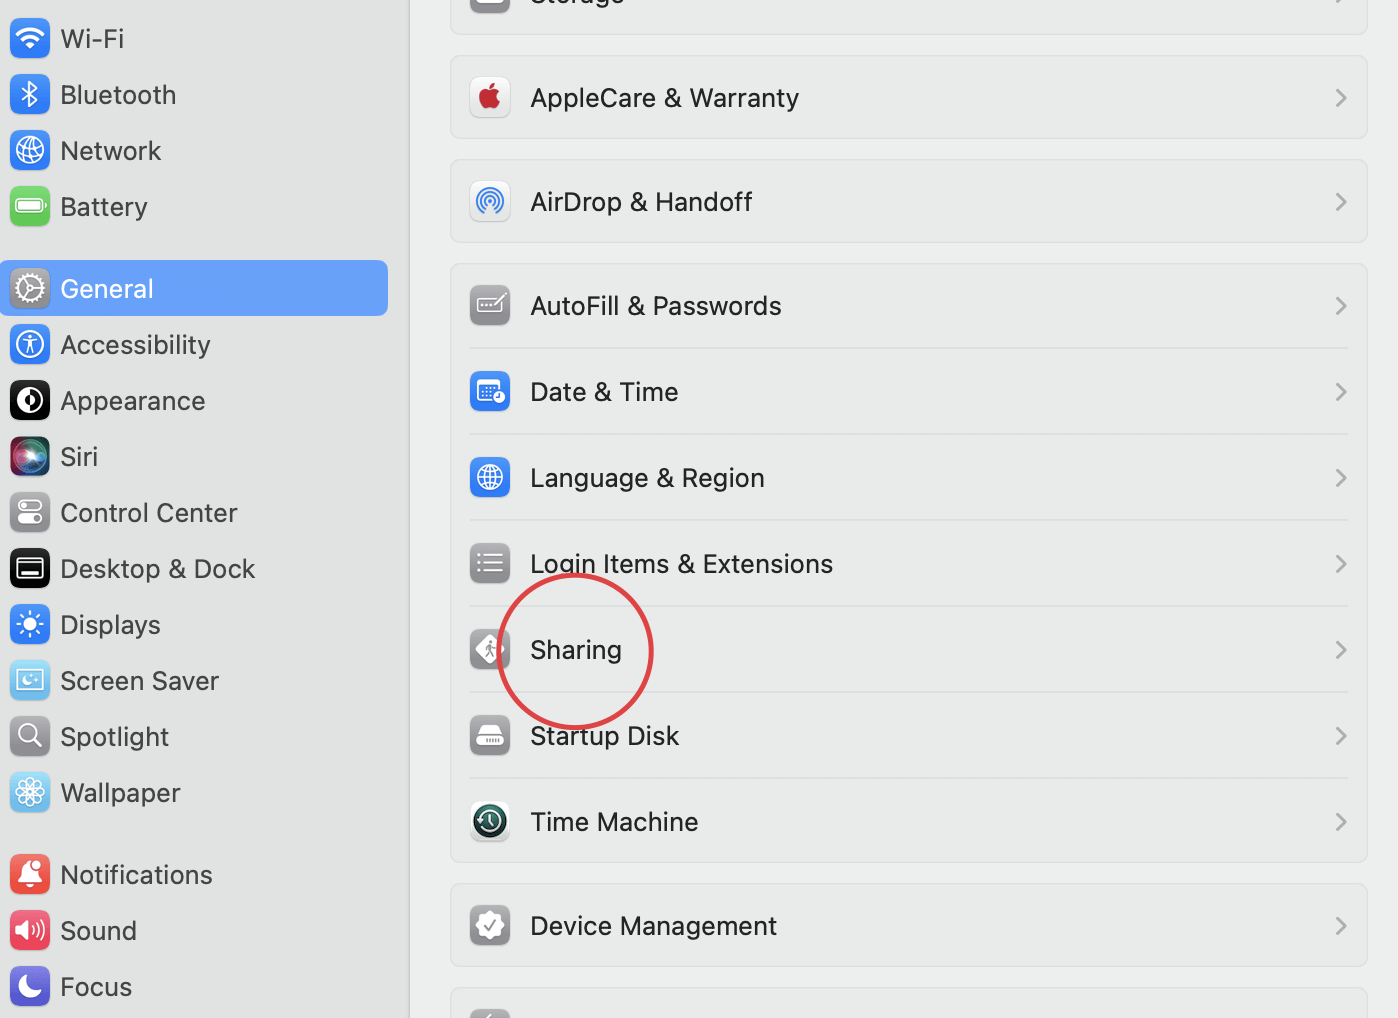
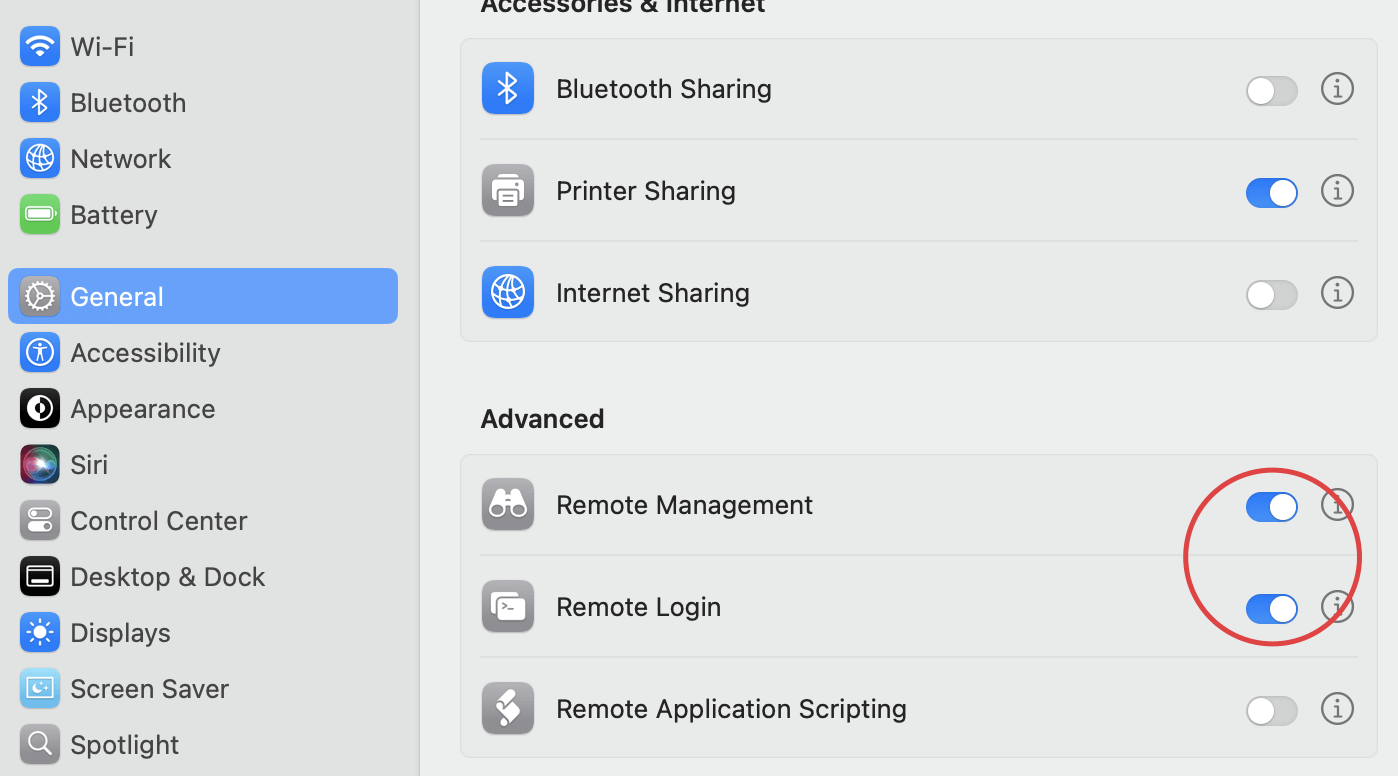
In Sharing, toggle the Remote Management and Remote Login options on.
Step 2: Select users
Next, decide which users can log in. Click the information icon next to the toggle switch for both options. Selecting “All users” will allow anyone on your network, as well as any of your computer users, to access the device. The box titled “Only these users” will let you choose specific users, so you can add and remove users and groups as needed.

Step 3: How to log in from another computer
Once your computer is set up for remote desktop connection, you can log in remotely from another device. Here’s how:
- Open the Terminal app on your Mac. If you’re using a different device, open an SSH client. This software program allows you to connect to a remote computer using the Secure Shell protocol.
- Type the SSH command, then press Return.
- The basic SSH command format is: ssh username@hostname
- The hostname can be an IP address or a domain name. For example, with the username paul and computer IP address 10.1.2.3, the command would be: ssh paul@10.1.2.3
- Enter your password, then press Return.
Establishing a remote desktop connection for Windows
Next, we’ll look at setting up a Windows remote desktop connection. As of June 2025, Microsoft Windows was the dominant desktop operating system (OS) worldwide, with a share of just over 70%, so you will be more likely to come across this remote setup, especially in a work environment.
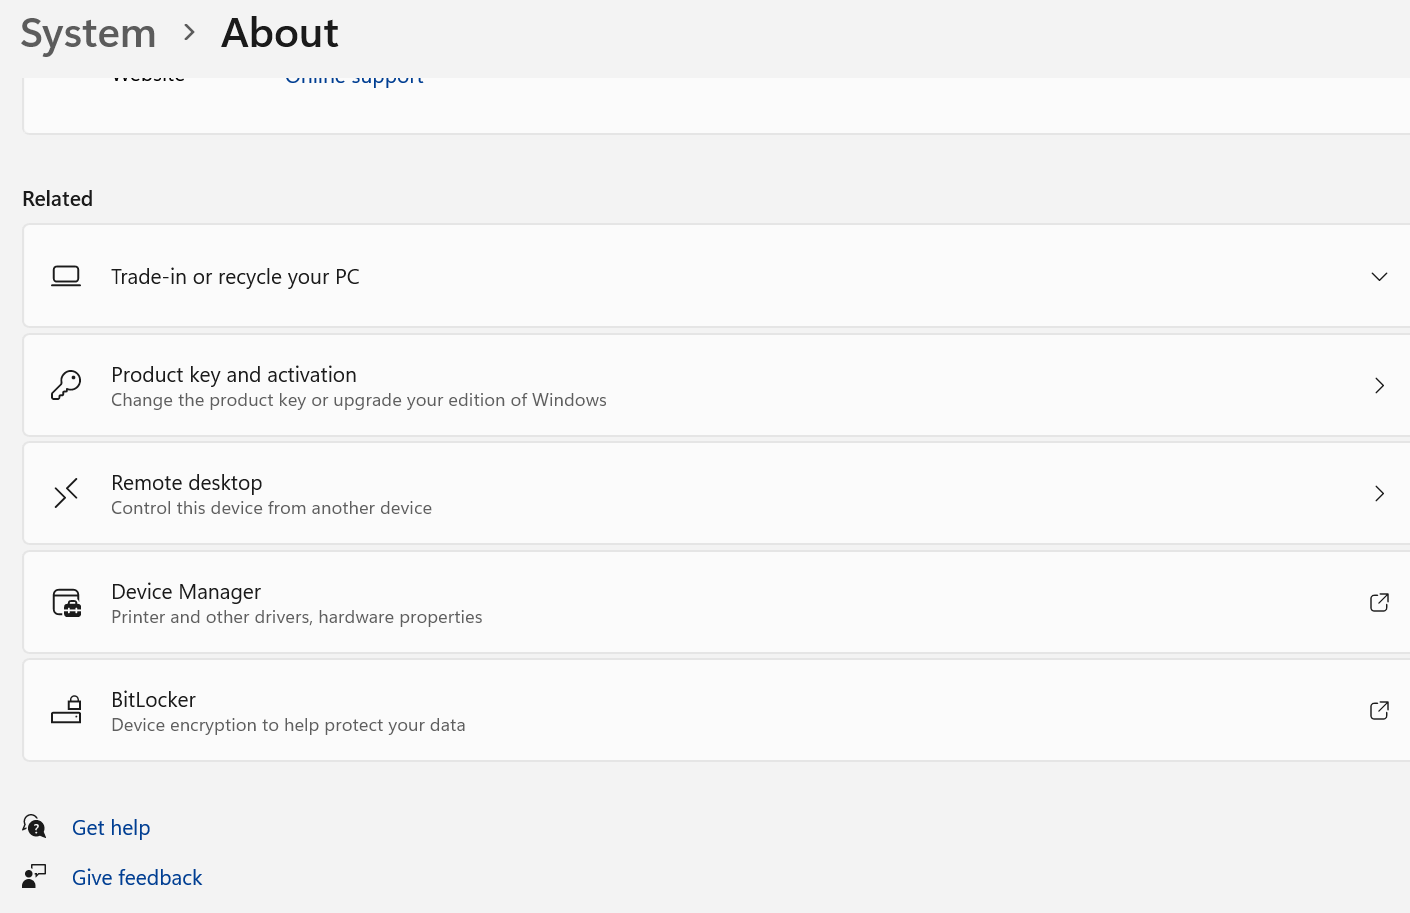
Step 1: Access the Systems app
To get into the Systems app, start by clicking on the Windows logo at the bottom of the screen. From there, click on the Settings icon and then the System menu.
Step 2: Access Remote Settings
Once you’re on the Systems page, click on the Remote Desktop menu option. Click on the slider button to enable remote desktop access. Press confirm on the pop-up screen prompt that will appear. You may also need to change your firewall settings before connecting remotely.
Step 3: Select the desired users
Once connected, add users by clicking on Select Users on the Remote settings page. If you’re listed as an administrator on the remote device, you will automatically be able to control that device.
In Select Users, add the usernames of the accounts that need access. Make a note of the computer name you’re accessing remotely so that you have it when you need to log on.
Step 4: How to connect to a Windows remote desktop
Once you’ve set up the remote desktop for your device, you’re ready to connect. Follow the steps below:
- Set up the viewing environment: To start, open the program you’re using for remote connection. The program you choose will depend on your device and remote needs. For example, whether you’re connecting with a group of devices or just one. If you have the option, set up configurations to connect remotely via a browser.
- Start a remote connection: If you’re using Windows, you’ll find the Remote Desktop Connection app in the Accessories folder. When you have the window open, type in the name or IP address of the computer you want to connect to.
Type in your username, click connect, and enter your password when prompted to start a remote session. If you’ve completed these steps, you should be connected to the remote computer.
If you’re using an Apple computer, you simply need to open the Remote Desktop app, select the remote device you want to connect to, and follow the prompts.
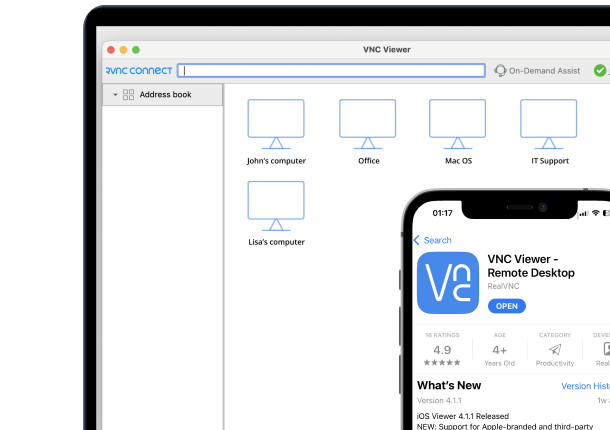
Access your computers from anywhere with RealVNC Connect
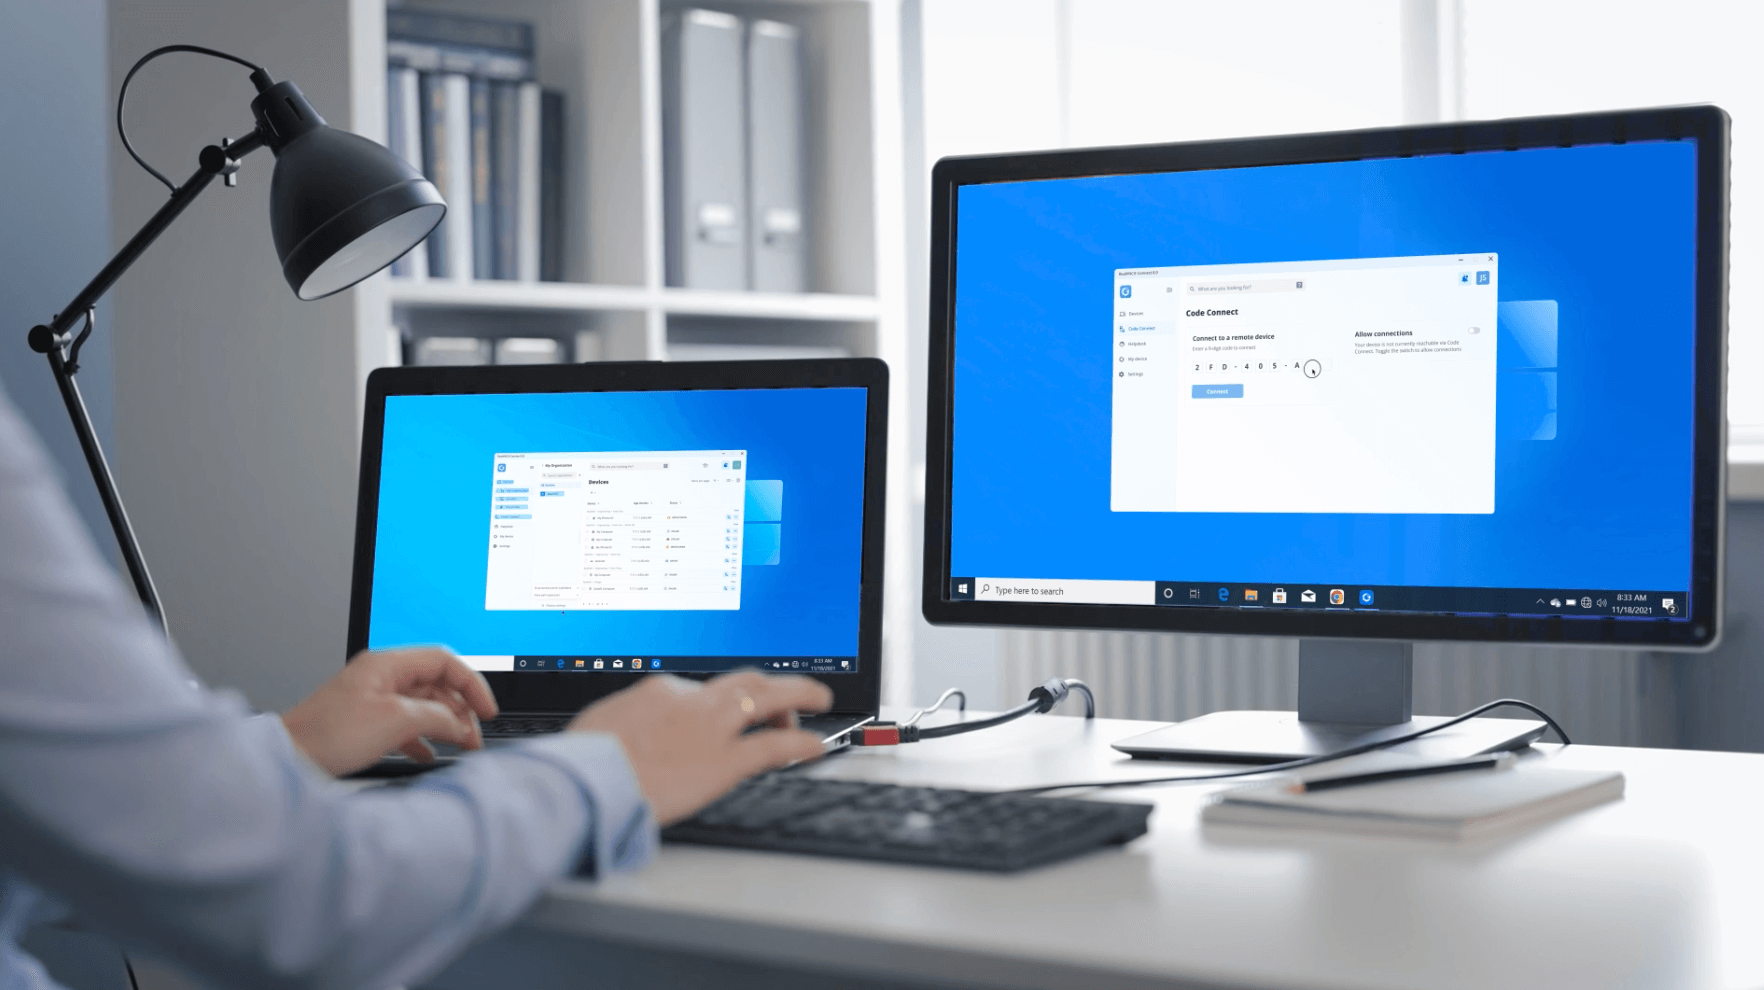
Built-in remote desktop tools can get the job done, but they often require manual setup, firewall configuration, and device-specific instructions. For teams or individuals looking for a faster and more reliable option, RealVNC Connect offers a more streamlined and secure way to stay connected.
Version 8 Beta introduces a unified desktop app that combines the server and viewer into a single, lightweight installation. You only need to install one app on any supported device to connect, view, and control another computer without juggling multiple components.
It’s simple to use, yet built with enterprise-scale needs in mind. You can organize devices using multi-level lists, mark your most-used machines as Favorites, and quickly check availability with presence indicators. Everything is designed to make navigation fast and intuitive.
Access controls and security settings are managed through a central admin console, giving IT teams the visibility and control they need without complicating the experience for users.
RealVNC Connect works across Windows, macOS, and Linux, and provides secure, encrypted remote access without requiring a Virtual Private Network (VPN). It’s everything you need to stay productive from wherever you are.
FAQs about remote desktop
How do I enable remote desktop connection?
This depends on the operating system being used, the remote computer’s location, the level of security required, and the type of remote connection that will be best for you.
To decide which connection is best for your business, you should consider zero trust network access vs remote access. You should also look into these common types of remote connections: Remote Desktop Protocol (RDP), Virtual Private Network (VPN), and Remote Access Service (RAS).
Once you’ve decided on the best type of remote connection, you need to configure your devices for remote access. You may need to enable remote desktop or set up a VPN server, as well as download any necessary remote connect software or drivers.
An RDP connection needs Remote Desktop Connection software, while a VPN may need client software installed.
Can you remotely connect to WiFi?
With remote desktop software, you can control the desktop of a device connected to a WiFi network, no matter where it’s based. Still, to access a device over WiFi, it must be set up to allow remote access and have the necessary ports and security settings correctly configured.
However, using cloud connections with RealVNC Connect makes it all much easier. The software does all the connection brokering for you.
It’s important to note that remote access over WiFi can pose security risks if not using an adequately protected solution. Using a strong password and encryption is crucial when setting up remote access.
Additionally, some wifi networks may have restrictions or firewalls that prevent remote access. Check with your local network administrator or service provider before attempting to connect to a WiFi network remotely.
How do I reset my remote connection?
If you’re experiencing issues or need to reconfigure your remote connection, you may have to reset it. Here’s a basic guide on how to reset your remote connection:
- Close the remote connection software. If you’re currently connected to a remote computer or network, properly disconnect and close the remote connection software.
- Restart the remote computer. Restarting the remote device can help solve remote connection issues.
- Check network connectivity. Try checking the network connectivity between the local PC and the remote computer. Ensure that both computers are connected to the internet or a shared network and that the connection isn’t blocked by a firewall or router settings.
- Review remote connection settings. If the connection is still not working, double-check your settings. Make sure they match the requirements for the type of connection being used and adjust them if they’re wrong.
- Reconnect to the remote computer. Once you’ve reviewed and adjusted the settings, select Connect to reconnect to the remote device. Follow the prompts to authenticate and establish the connection.
If the above steps do not work, consult your remote connection software documentation or contact technical support for assistance.