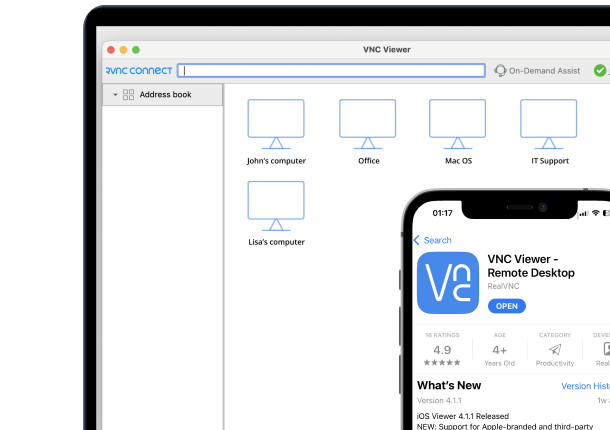




If your day-to-day machine runs Linux but a Mac also has files, apps or a project you need to reach, RealVNC Connect lets you view and control a Mac’s desktop from your Linux computer, over the internet or your local network, in a few minutes of setup.
Why access a Mac from Linux
This kind of cross-platform access comes up when testing how a site or app behaves on macOS, picking up a file from a work Mac while you’re on a Linux laptop, or helping a colleague troubleshoot their Mac remotely. RealVNC Connect works the same way regardless of which operating systems are on each end.
What you’ll need
- A Mac running macOS, either on the same network as your Linux computer or reachable over the internet
- A Linux computer to connect from
- A RealVNC Connect account and licence – a free trial is available
- About 10 minutes to complete setup on both devices
Step 1: Set up RealVNC Server on your Mac
On the Mac you want to control:
- Download the RealVNC Connect setup app from the RealVNC website.
- Click Download for macOS.
- Click Accept and Install, and follow the on-screen instructions.
- Once installation completes, choose Start my free trial if you’re new to RealVNC Connect, or Sign in to continue if you already have an account.
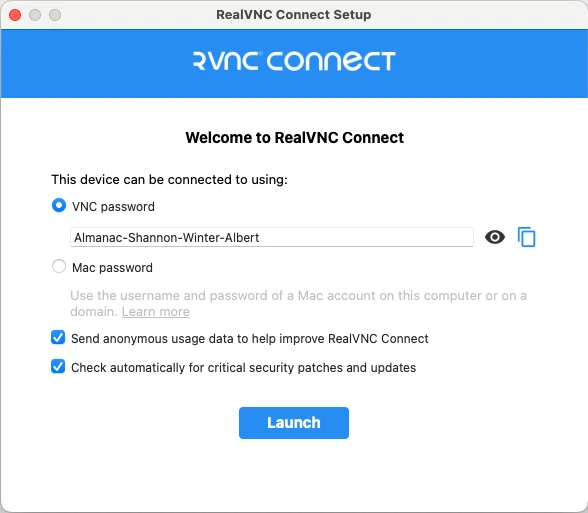
- Your browser will open automatically. Follow the on-screen prompts, then click Allow to return to the RealVNC Connect Setup app.
- Review the settings shown, then click Launch. If you keep the default VNC Password, make a note of it – you’ll need it when you connect from another device.
Granting the macOS permissions RealVNC Server needs
On macOS Mojave and later, RealVNC Server needs Screen Recording and Accessibility permission before it can show and control the Mac’s desktop. Skip this step and RealVNC Viewer will show a blank screen, or you’ll only get view-only access.
- When prompted, click Open System Settings, then click the padlock icon at the bottom left to make changes.
- Enter an administrator’s username and password when asked.
- Enable the option for vncagent under both Screen Recording and Accessibility, then click the padlock icon again to lock the changes.
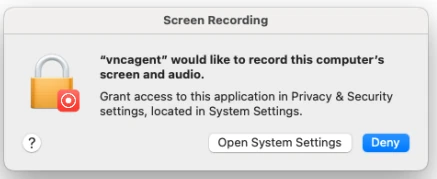
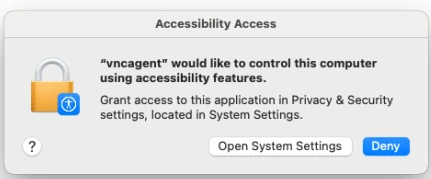
You’ll also see a monthly prompt asking to allow vncagent to capture your entire screen and audio – this is expected, and approving it keeps the connection working.
Step 2: Install RealVNC Viewer on your Linux computer
On the Linux computer you’ll be connecting from:
- Download the RealVNC Connect setup app.
- Click Download for Linux.
- Extract the installer in your Downloads folder using your file manager, then run it by double-clicking the RealVNC Connect installer icon.
- Click Accept and Install, and follow the on-screen instructions. If prompted to disable Wayland, click Yes – this is required for RealVNC Connect to work correctly.
- Choose Start my free trial or Sign in to continue, using the same RealVNC account you used on the other device.
- Your browser will open automatically. Follow the on-screen prompts, then click Open to return to the RealVNC Connect Setup app.
- Review the settings shown, then click Launch.
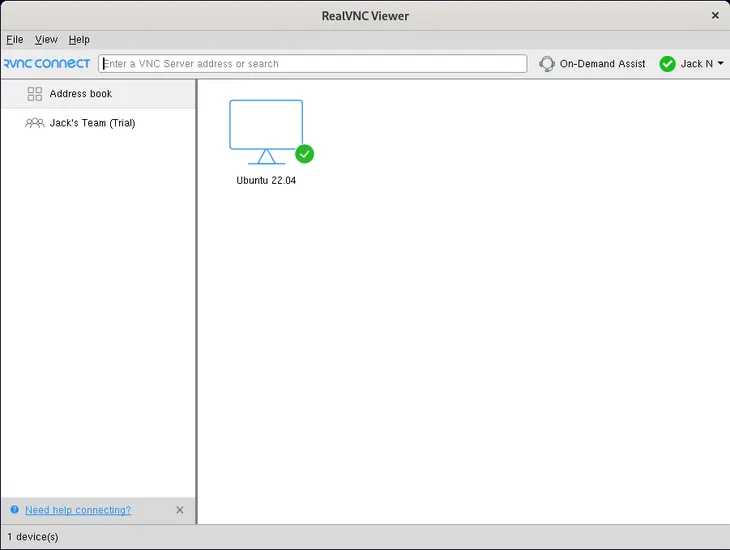
Your Mac will now appear automatically as a connection in RealVNC Viewer, listed under your team.
Step 3: Connect to your Mac for the first time
In RealVNC Viewer, double-click the Mac you want to connect to.
Verifying the connection with Identity Check
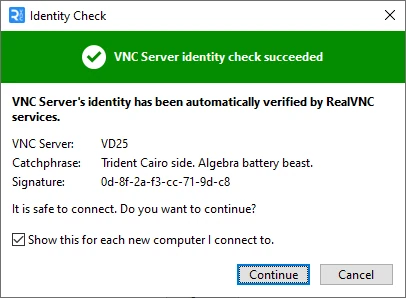
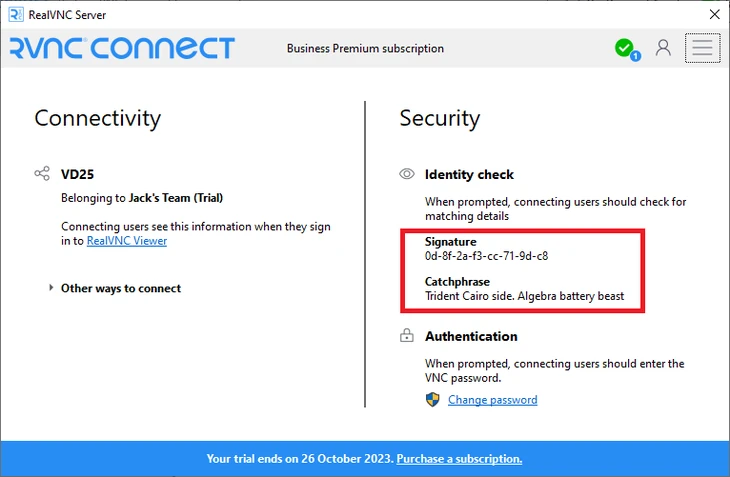
The first time you connect, RealVNC Viewer shows an Identity Check screen with a Catchphrase and Signature. Compare these against the values shown in RealVNC Server on the remote computer to confirm you’re connecting to the right machine. RealVNC Viewer remembers this identity and will warn you if it ever changes on future connections.
Authenticating
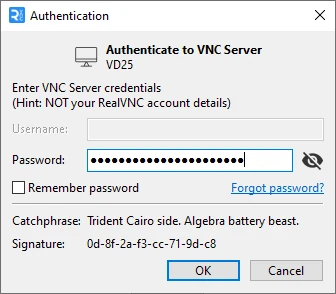
Enter the VNC Password you noted during setup. If you chose Mac Password authentication instead, use the username and password of a user account on the Mac.
Controlling who can connect to your Mac
If you set up authentication using Mac Password, only members of the Mac’s Administrators group can connect by default. To let other users in, add them via Managing users and session permissions for RealVNC Server on the Mac – otherwise they won’t be able to authenticate, even with valid macOS credentials.
Troubleshooting common issues
- Blank screen or view-only access: check that Screen Recording and Accessibility permissions are enabled for vncagent in System Settings > Privacy & Security on the Mac.
- Can’t authenticate: make sure you’re using the password noted at setup, or the correct macOS account credentials if you selected Mac Password authentication.
- RealVNC Connect won’t install on Linux: make sure Wayland is disabled when prompted during installation – RealVNC Connect currently requires an X11 session.
Keeping your connection secure
RealVNC Connect encrypts cloud connections end-to-end, and every new connection is verified using the Identity Check described above. For extra protection, turn on two-factor authentication on your RealVNC account and use session permissions to control exactly who can view or control the Mac.
Start controlling your Mac from Linux with RealVNC Connect
RealVNC Connect offers a free trial with no credit card required, so you can test remote access between your Linux computer and Mac before subscribing.
FAQs
Can I access my Mac from a Linux computer?
Yes. Install RealVNC Server on the Mac and RealVNC Viewer on your Linux computer, then connect using your RealVNC Connect account or a VNC Password.
Does my Mac need to be switched on and unlocked?
The Mac needs to be powered on with RealVNC Server running, but it doesn’t need to be sitting unlocked at the login screen.
Why do I see a blank screen when I connect?
This almost always means Screen Recording and/or Accessibility permission hasn’t been granted to vncagent on the Mac. Enable both in System Settings > Privacy & Security.
Do I need a static IP address to connect?
No. A cloud connection through your RealVNC Connect account works over the internet without any router or firewall configuration.