
This article applies to RealVNC Connect version 8.0.
Ever spent time explaining the same process to different people, or wished you could refer back to the steps shown during a remote support session? With RealVNC’s session recording feature, it’s easy to create a visual record of your work, capturing everything from onboarding walkthroughs to complex troubleshooting steps.
Whether you’re training new team members, demonstrating compliance during audits, or just saving time on repetitive support tasks, recording your remote sessions can be a game-changer.
Why should you record VNC sessions?
Recording remote sessions provides your business with a clear trail of what happened, who was involved, and when, which can be critical for IT teams reviewing support issues, trainers delivering consistent demos, and managers meeting compliance requirements.
Some common use cases include:
Training and Onboarding: Record complex software training sessions and reuse them. New employees can watch these recordings at their leisure, and the training process will be consistent and time-saving for trainers.
Auditing and Compliance: Record workflows or processes on video for auditing purposes. This is particularly useful in regulated industries where you need to keep a detailed record of what was done on remote systems for compliance.
Customer Support and IT Troubleshooting: Record screen sessions while providing remote support to be transparent and accountable. This is great for documenting how issues were resolved or for reference if the same issue comes up again.
RealVNC Connect enables secure, transparent recording of remote desktop sessions. Read on for how to set it up and tips to organize, share, and secure your recordings
Security you can trust
Every recording carries the same protection as a live RealVNC session. That means full end-to-end encryption and enterprise-grade security. If you work in a regulated industry, it gives you the ability to prove exactly how remote access was handled, and it ensures sensitive data isn’t exposed. Plus, keeping session logs makes audits far less stressful.
A new unified experience in v8
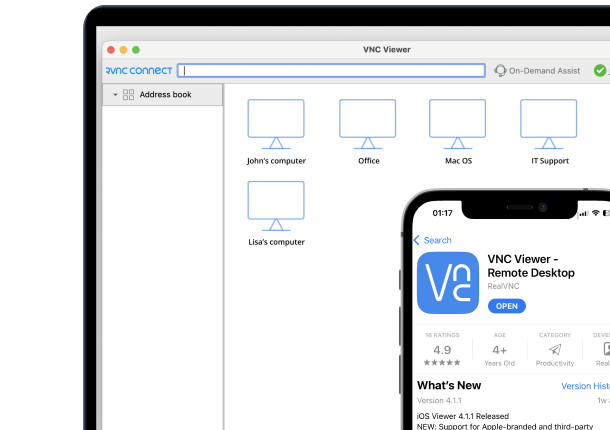
Starting with version 8, RealVNC Connect brings together the VNC Viewer and VNC Server into a unified app for Windows, macOS, and Linux. So, whether you’re connecting to another computer or sharing your own, everything is now accessible from a single interface.
Note: If you need to use the separate Server and Viewer apps, you can still download them from the RealVNC website.
Before you begin, set your screen recording preferences
RealVNC Connect allows you to record sessions as a WebM video file. This feature can only be used on desktop operating systems (Windows, macOS, and Linux).
The video file recorded will contain everything visible on the screen of a remote device for the duration of the recording.
To choose where the files will be saved:
Open RealVNC Connect (v8 unified app), then click File > Preferences.
Go to Recording.

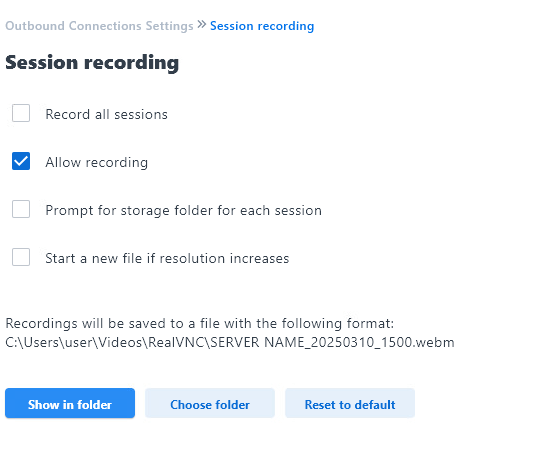
Under Recordings you can see where the software saves files by default. You will note you can also click Show in folder to access the respective folder. The latter will be especially useful if you want to come back to your recordings later.
You can also select the folder every time you start the screen recorder.
The recorded session will be saved as a video file.
If you’re using the feature for auditing purposes, you might want to Record all sessions. Admins can enforce this as a policy, so you don’t have to rely on individual users to remember to hit record.
To show a persistent notification when a session is being recorded on the machine you are connecting to, set RecordNotifyAlways to True in Inbound Connection Settings / Advanced
To display a prompt to the remote user that requires them to allow session recording, set RecordQuery to True in Inbound Connection Settings / Advanced
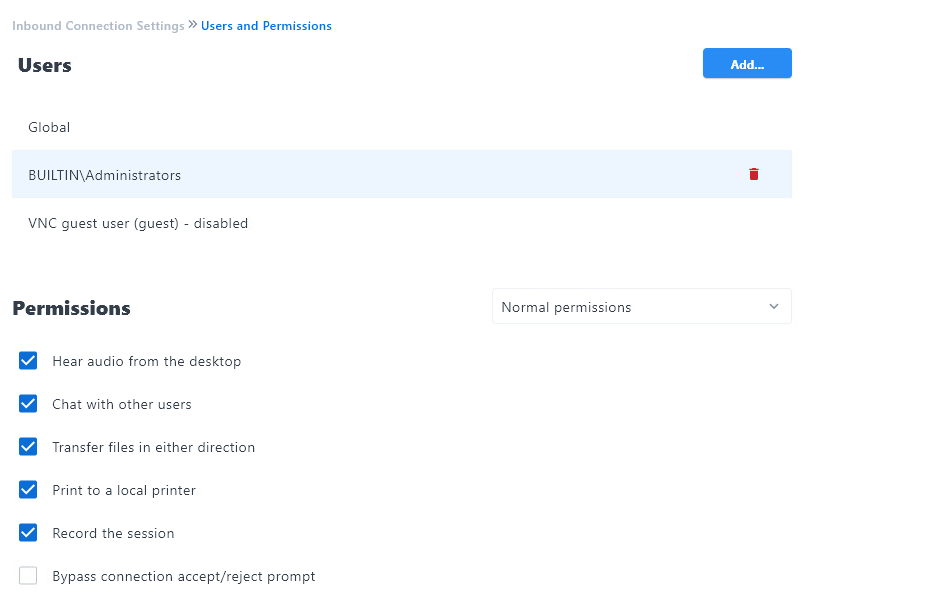
The ability to record sessions can also be configured on a per user or per user group basis where Windows authentication is in use by enabling or disabling the Record the session permission.
Now that everything is set, you can start using the feature.
Let’s start recording!
You’re now ready to start recording your screen capture. Start RealVNC Connect and access the machine you want to record a session on. Depending on your RealVNC Connect security settings, you might need to authenticate.
You can also start the recording from the command line. Once connected, click the red Record button on the toolbar. Once you click the button, the software will start recording your session. That’s it!

A pop-up message confirms that recording has started. The Screen Recording icon state indicates that session recording is active.
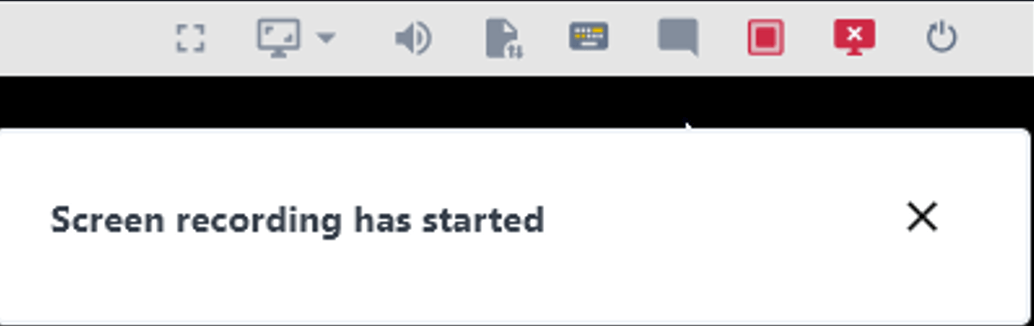
RealVNC Connect is now recording the screen of the remote device. Toolbar and informational messages are not visible on video recording.
To stop the recording click the Screen Recording button in the Toolbar.
Once the recording has stopped, a notification window is displayed.
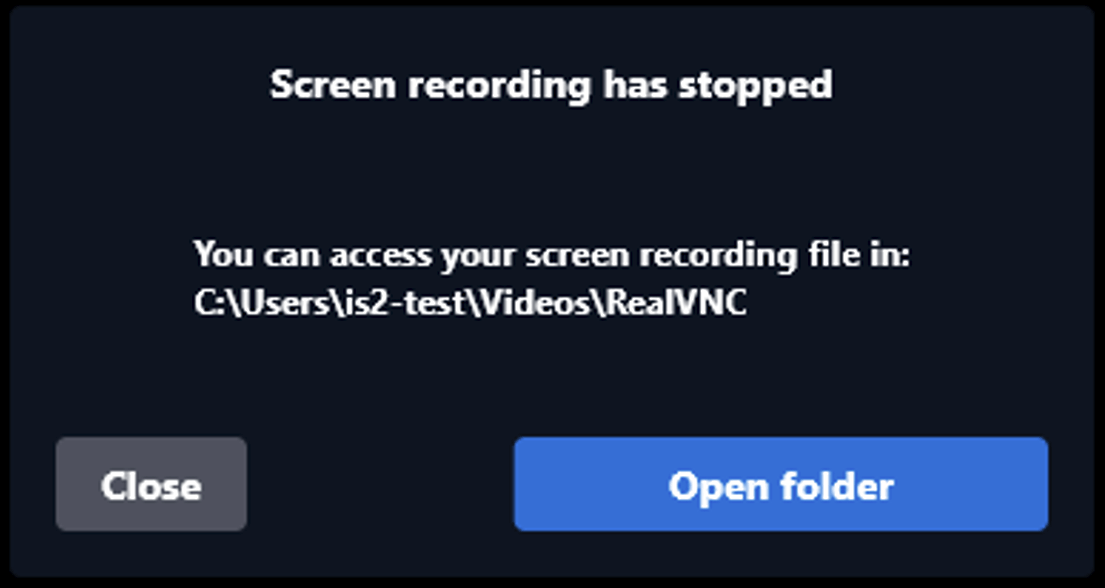
Click the Close button to close the notification window or Open Folder button to view the video file.
You will find the resulting file in the location that you’ve set in the Preferences menu.
Recordings are stored locally on the viewer’s machine by default, so you stay in control of where files live. If you need to store files in the cloud or in a shared drive, you can copy them safely after the session.
Share the love!
You can also share your recordings with colleagues. All you need to do is to go to the location you’ve set in the first part of this tutorial. Then, you can copy the file to a shared drive, or even a cloud storage service, like OneDrive or Dropbox. Share the link to the location with your colleagues and you’re all set.
To use this feature you need to download the latest version of RealVNC Connect, available for Windows, MacOS, as well as Linux.
A short video version of this tutorial is also available. You can take a look at it below.